
A storm can leave roof damage that is easy to miss at first glance. In Tulsa and Northeast Oklahoma, we see about 50 thunderstorm days per year, so we need a repeatable way to check for leaks, roof damage, and safety issues fast.
| Quick Summary | What We Need to Do |
|---|---|
| Start with safety | If access looks unsafe, stay off the roof and call a roofer |
| Check inside first | Look for stains, drips, wet materials, and electrical risk |
| Inspect the roof in sections | Review membranes, metal panels, flashings, edges, and drains |
| Document everything | Take photos, mark locations, and note severity |
| Know when to stop | Active leaks, sagging areas, loose equipment, or storm openings need pro help |

If you manage or own a commercial building, this checklist helps us answer three things fast: Is it safe, what damage can we see, and does it need emergency roof repair? We start on the ground, check inside before the roof, inspect surface areas in a set pattern, and document every issue with photos and location notes. We also track ponding water, blocked drains, flashing damage, hail marks, and loose rooftop equipment. If we spot active leaks, soft spots, exposed materials, unsafe access, or storm movement, we stop and bring in a roofing pro.
Post-Storm Commercial Roof Inspection Checklist: Step-by-Step Process
What to Look for When Inspecting a Commercial Roof | Roofing it Right with Dave & Wally by GAF
sbb-itb-66ccccd
Roof Surface Checklist: Membranes, Panels, and Impact Damage
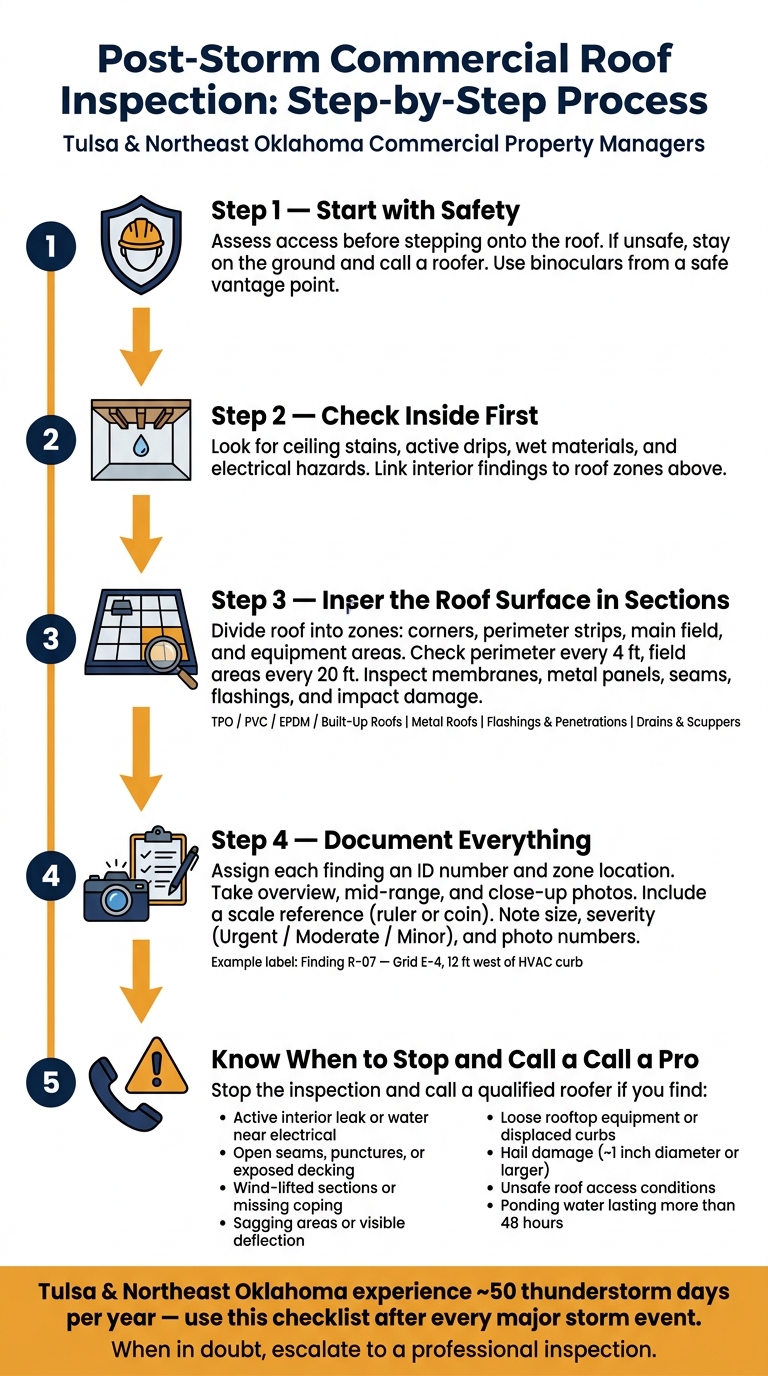
After the interior walk-through, head to the roof surface and inspect it zone by zone. We should split the roof into corners, perimeter strips, the main field, and spots around equipment or penetrations. Check perimeter zones every 4 feet or less, and field areas every 20 feet. Move through each zone in a steady grid pattern. Perimeter zones and corners come first because they take more wind exposure.
Use one checkbox for each finding. Record the zone, exact location, size, severity, and photo number. Example: Zone N-2; 3-foot seam opening; 18 inches west of rooftop unit; moderate; Photos 07–09. Stick to one severity scale the whole way through: Urgent (active opening, exposed deck, major displacement), Moderate (open seam, loose panel, widespread coating loss), or Minor (denting, isolated surface scuffing, no apparent opening). Keep the wording the same from note to note.
leave the roof as-is for a Tulsa roofing company. That means we should not probe soft areas, pull seams apart, move gravel, tighten fasteners, or apply sealant.

Membrane and Flat Roof Damage Checks
Start with the roof surface, then move to seams, panels, and impact points. On single-ply membranes, including TPO, PVC, and EPDM, and on built-up roofs, check for:
- punctures, cuts, tears, or holes
- open, wrinkled, or displaced seams where adhesive or welded bonds look separated
- blisters, bubbles, ridges, or tenting
- membrane shrinkage, such as pulled-back edges or tension at perimeter details
- exposed insulation, cover board, or roof deck
- displaced or missing surfacing
- soft, spongy, or deflected areas that may point to hidden moisture
FM Global lists open seams, membrane shrinkage, and holes or deterioration in the covering as post-storm conditions to note. On built-up roofs, pay close attention to displaced or missing aggregate, bare areas with exposed felts, open laps, and any spot where the mineral surface has been stripped away. Gravel displacement can point to wind uplift or debris impact. It also leaves the layers below open to UV exposure and water entry, so photograph it and leave repairs to a professional.

Metal Roof Damage Checks
On metal roofs, shift our attention from surface marks to fasteners, seams, and coating loss. Use separate checkboxes for each type of issue. That includes hail or debris dents and deformation, punctures or holes, displaced or uplifted panels, open side laps or end laps, and loose or missing fasteners.
Also check for:
- cracked, split, or missing washers and gaskets
- separated ridge caps
- damaged eave or rake trim
- bent or detached flashing
FM Global identifies backed-out fasteners, loose flashing, and opened seams as metal-roof deficiencies that require documentation after wind events. Make a note if a dent has changed a seam, fastener line, or drainage path. Cosmetic denting is not the same as deformation that opens a lap to water.
Record any area where coating has been scraped, peeled, or worn away. Note the affected panel, the approximate area, and whether exposed base metal or visible oxidation is present. Coating loss near a lap, fastener, or drainage location deserves closer attention than an isolated surface scuff.

Perimeter and Drainage Checklist: Flashings, Penetrations, and Ponding Water
After the roof surface check, move to the perimeter and drainage points. That’s often where storm damage shows up first.
Flashing and Penetration Checks
Work around the perimeter in one direction so we don’t miss anything.
At parapet caps and coping, look for lifted, bent, displaced, cracked, or missing sections. Also check for open joints at corners and seams, missing splice plates, and failed sealant. These spots can loosen fast after a storm, and small gaps can turn into leaks before we know it.
At edge metal and termination bars, check for loose or missing fasteners, elongated fastener holes, and membrane edges that have pulled away from the bar. If the edge is no longer tight, water and wind can keep working their way in.
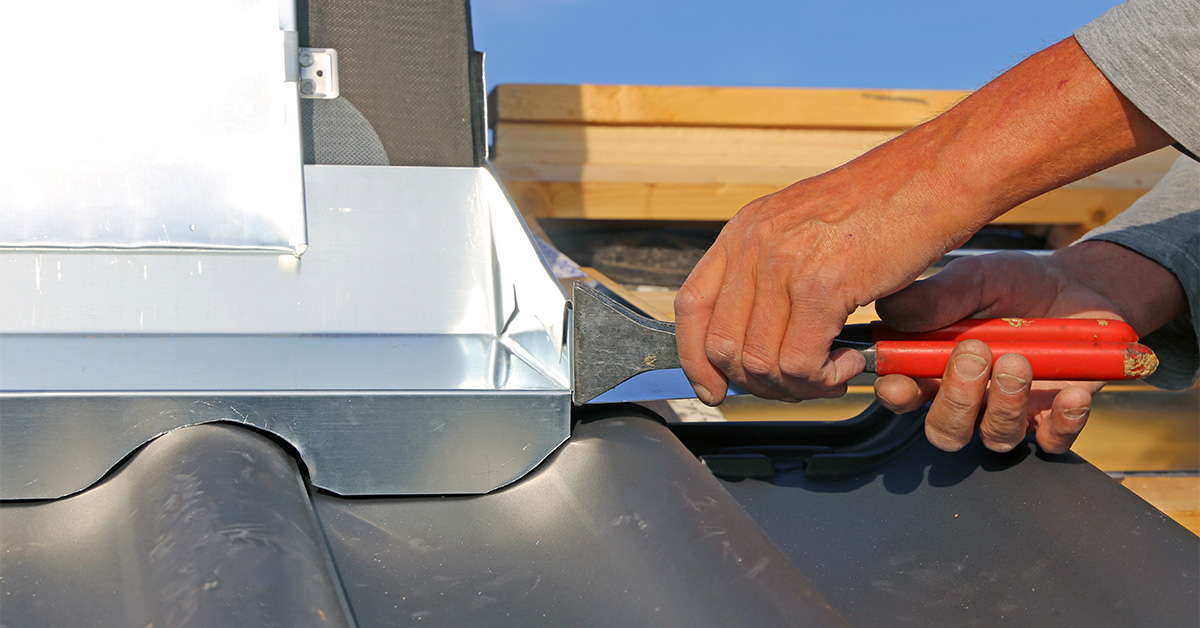
Then inspect each penetration one by one: pipe boots, vents, skylights, HVAC curbs, exhaust fans, conduit supports, equipment stands, and other rooftop supports. For each one, check for lifted boots, cracked or displaced sealant, open seams, broken fasteners, bent sheet metal, separated curb corners, and membrane pulled away from the penetration. It helps to treat every penetration like its own checkpoint. Mark each one on your roof plan or zone map so nothing gets skipped. Use the same zone map from the surface check.
At wall flashings, counterflashings, through-wall flashings, wall-to-roof transitions, and expansion joints, look for separation, wrinkling, cracking, punctures, displaced metal, open seams, and exposed substrate. Confirm that counterflashing is still properly engaged and that sealant joints are continuous, not split, pulled away, or washed out. If any flashing is loose or visibly displaced, leave it alone and do not try to resecure it with improvised fasteners.
Drainage and Ponding Water Checks
Check drains, strainers, scuppers, gutters, and downspouts. Confirm each one is present, unobstructed, securely attached, and able to carry water away from the roof. Remove only loose debris within safe reach, and stay clear of edges and standing water. FEMA specifically highlights the importance of secondary overflow scuppers on parapet roofs, noting that wind-borne debris can block primary drains rapidly.
If you find standing water, record the location, approximate dimensions, estimated depth, date, time, and whether it is still present after rainfall stops. Photograph it from a stable position and include a fixed reference point, like a drain, rooftop unit, or parapet corner. Standing water that lasts more than 48 hours can point to blocked drainage, poor slope, or deck deflection and should be reviewed by a professional.
| Component | What to Check | Red Flags |
|---|---|---|
| Roof drains & strainers | Presence, blockage, displaced parts | Missing strainer, debris dam |
| Scuppers | Clear opening, attached metal, mortar condition | Bent metal, blocked outlet |
| Gutters | Attachment, dents, overflow marks | Sagging gutter, separation |
| Downspouts | Connection, discharge path, blockage | Pulled joints, base pooling |
| Secondary overflow | Clearance at parapets, open path | Blocked overflow |
If the same low spot shows ponding after multiple storms, or if ponding stays in place after the drainage path looks clear, the problem likely runs deeper than debris. Recurring water rings, cracked or stressed membrane near a depression, or sagging deck areas are warning signs that a qualified roofing professional or structural engineer should assess, not something to fix by cutting the membrane or changing the drain yourself. Record these conditions before cleanup or any temporary repairs.

Storm Damage Documentation Checklist: Photos, Notes, and Insurance Records
We need to record storm damage clearly enough that a crew, manager, or adjuster can act on it. For each finding, note what we saw, what may have caused it, and what should happen next.
This record helps us sort findings before we decide whether the roof needs immediate professional review.
How to Record Photos and Location Notes
Start with overview photos, then take medium-range and close-up shots of each defect. When it’s safe, place a ruler, tape measure, or coin beside the damage so the size is easy to see.
Give every finding its own ID number and tie it to a clear location. For example: "Finding R-07 – Building A, east roof, Grid E-4, approximately 12 feet west of the rooftop HVAC curb." Record interior damage on its own and link it to the likely roof area, like this: "Suite 210 ceiling stain below Roof Section 2, near HVAC curb."
Also record:
- Blocked drains
- Ponding water depth and how long it remained
- Impact marks on soft-metal flashing and trim
- Displaced exhaust hoods or pipe supports
- Wet insulation or ceiling materials

Keep the original files and back them up. Don’t rely on screenshots or texted copies.
Pro-Tech Roofing can document findings and meet with your insurance adjuster on-site. Keep copies of all reports, estimates, photos, receipts, and adjuster correspondence.
Finding Priority Table
The table below turns each finding into a next step.
| Observed Condition | Risk | Immediate Action | Next Step |
|---|---|---|---|
| Puncture or open seam in a roof membrane with interior staining below | Continued water intrusion | Photograph and place temporary protection only if safe; protect contents below | Repair Recommended – arrange a qualified roof assessment and moisture evaluation |
| Dented or punctured metal roof panel, loose fastener, or lifted seam | Progressive leakage or panel detachment | Keep personnel away; do not walk on unstable panels | Urgent Professional Evaluation |
| Blocked roof drain or accumulated debris near a drain | Ponding water and leakage risk | Remove debris only when safe and authorized; document water depth and location | Temporary Protection Needed or Urgent Professional Evaluation, depending on water level and structural concern |
| Displaced rooftop component, unsecured equipment cover, or loose flashing | Falling-object hazard or new openings | Isolate the area; avoid handling unstable components | Urgent Professional Evaluation |
| Ceiling stain with no active dripping and no confirmed source | Hidden moisture or mold growth | Photograph, protect contents, and record room and roof location | Repair Recommended – correlate with roof findings |
| Minor denting or isolated impact mark with no opening or leakage | Concealed damage | Photograph with a scale reference and record dimensions | Monitor or Repair Recommended after professional review |
| Active interior leak, saturated ceiling, exposed wiring, or severe roof displacement | Immediate safety, electrical, and structural risk | Keep occupants away, notify building management, and contact qualified emergency professionals | Urgent Professional Evaluation |
If a finding is urgent or unclear, move it to professional inspection next.

When to Call Pro-Tech Roofing for a Professional Inspection
After we’ve documented the damage we can safely see, there’s a point where it makes sense to stop and bring in a roofer. A visual check only goes so far. It won’t show hidden damage under the membrane, inside the insulation, around attachment points, or at HVAC curbs. And after severe weather, those hidden trouble spots can matter a lot.
Conditions That Require a Professional Inspection
If anything suggests an active leak, movement in the structure, or unsafe access, we should stop the visual review and escalate. Call a qualified roofer if you find any of the following:
- Active interior leak or water near electrical equipment
- Widespread membrane damage, open seams, punctures, or exposed insulation/decking
- Wind-lifted sections, loose edge metal, or missing coping
- Sagging areas or visible deflection
- Loose rooftop equipment or displaced curbs/supports
- Severe hail impact, especially hail about 1 inch in diameter
- Unsafe access conditions
If access is unsafe, stay on the ground and use binoculars or another safe vantage point.
For documented storm damage or unsafe conditions, schedule a professional inspection right away. Pro-Tech Roofing provides commercial roof inspections and storm-damage evaluations across Northeast Oklahoma. When we call, it helps to mention whether the property has active leaks, suspected hail or wind damage, ponding water, damaged edges, loose equipment, or any unsafe access conditions, so the team can prioritize the evaluation.

Key Takeaways From This Post-Storm Checklist
When a condition looks urgent or unclear, that’s our cue to stop the inspection and schedule a professional review.
FAQs
How soon should I inspect a commercial roof after a storm?
Inspect a commercial roof as soon as you can after a storm, ideally within 24–48 hours.
Begin with a safe ground-level check and a look inside the building. If you spot leaks, moisture, structural issues, displaced roofing materials, or clear hail or high-wind damage, call a professional right away.
Can hidden roof damage exist even if I do not see a leak?
Yes. Storms can leave damage behind even when the roof looks fine from the ground.
A roof may have bruised shingles, worn seals, or bent flashing without showing an obvious leak right away. That’s part of what makes storm damage so tricky. The problem can sit there quietly for weeks, or even longer, before it shows up inside the house.
Moisture can also get trapped in attic insulation or rafters. And once water gets into those hidden spots, it can lead to mold or wood rot before you ever notice a drip on the ceiling.
A professional inspection can spot these issues early.
What photos should I take for insurance after storm damage?
Take clear, high-resolution photos from several angles. Get wide shots of each roof slope and the full building, medium shots of problem areas, and close-ups of any damage.
For close-ups, place a ruler, coin, or similar item in the frame so the size is easy to judge. Turn on GPS and date stamps too.
It also helps to document damage inside the building, like ceiling stains or wet insulation, along with debris outside, such as shingle fragments or fallen branches. Natural daylight usually gives the best results, and a short video walkthrough can add useful context.