
When filing an insurance claim after storm damage, a thorough roof inspection is critical. Insurers need detailed evidence to verify damage and approve repairs. Missing this step can lead to claim denials, especially if damage seems caused by neglect. Key areas to check include shingles, flashing, gutters, and attic conditions. Document everything with clear photos, timestamps, and organized paperwork, such as repair invoices and weather data. Safety is also essential: clear debris, use proper equipment, and consider when to call a roofing professional for an inspection. Companies like Pro-Tech Roofing in Tulsa provide free assessments to ensure all damage is properly recorded for insurance purposes. Here’s how to prepare, inspect, and document damage effectively.

Step-by-Step Roof Inspection for Insurance: A Roofer’s Expert Guide – Part 1
sbb-itb-66ccccd
How to Prepare for a Roof Inspection
Getting ready for a roof inspection is a crucial step in supporting your insurance claim. By clearing debris, organizing essential paperwork, and ensuring safe access, you can help inspectors identify damage accurately while minimizing risks for everyone involved.
Remove Debris and Clear Access Points
Start by inspecting the area around your home for any debris or obstructions. Leaves, branches, and other organic material can trap moisture against shingles, leading to rot or leaks that might complicate your claim. Gutters clogged with twigs or shingle granules can also cause drainage problems, resulting in pooling water – something insurers might view as neglect.
"Clean out your gutters multiple times a year, especially after periods of heavy rainfall or leaf fall." – Alyssa Little, Senior Content Strategist, Openly
Pay close attention to shingle granules in the gutters, as their presence could signal bald spots or significant wear on your roof. Clear the ground around your home to allow inspectors to safely set up ladders and view the roof from various angles. Additionally, check for moss or algae growth, which can deteriorate shingles and retain moisture.
Once the area is cleared, turn your focus to gathering important documents.
Collect Maintenance Records and Insurance Documents
Having your paperwork in order can save time and strengthen your claim. In fact, 34% of denied insurance claims result from incomplete or inaccurate documentation of roof damage. Make sure to organize the following:
| Document Type | Purpose for Insurance Claim |
|---|---|
| Declarations Page | Confirms coverage limits, deductibles, and exclusions |
| Past Repair Invoices | Establishes the roof’s condition before the storm |
| Dated Photos | Differentiates sudden damage from normal wear and tear |
| Weather Data | Links the damage to a specific weather event |
| Receipts for Emergency Fixes | Shows efforts to prevent further damage |
For example, receipts for temporary fixes like tarping (which typically costs $50–$300 depending on the size) are often required. Keep in mind that most insurance policies require claims to be filed within 48 to 72 hours of discovering the damage. Store all documents – including contractor invoices, photos, and correspondence – either digitally or in a waterproof folder.
With your paperwork ready, focus on ensuring safety during the inspection.

Set Up Safety Equipment and Protocols
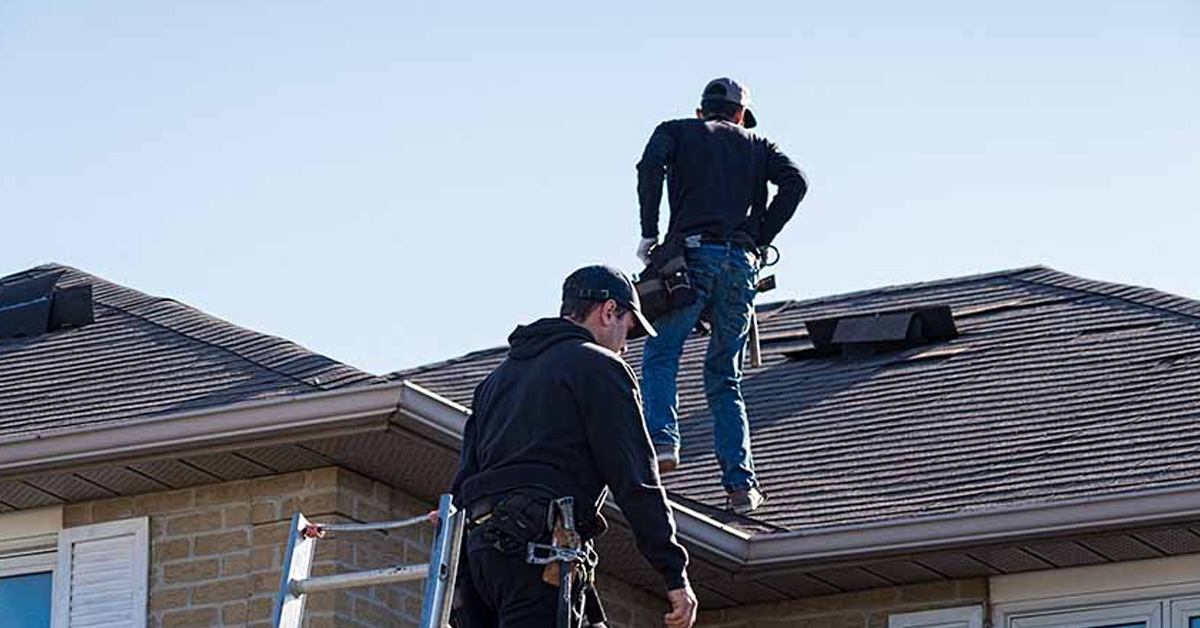
Roof inspections can be risky, especially on steep or slippery surfaces. Use a sturdy ladder placed on even ground, ensuring it extends at least three feet above the roof edge. If you’re inspecting the roof yourself, wear non-slip footwear and avoid climbing during or right after rain, when surfaces may be slick from moisture, moss, or algae.
"If you have any doubts about your safety or are simply uncomfortable examining your roof closely, leave this to a professional." – Alyssa Little, Senior Content Strategist, Openly
Many professional inspectors rely on aerial measurement technology, which delivers CAD-certified data with 99% accuracy – eliminating the risks associated with manual inspections. Before anyone steps onto your roof, check from the ground or attic for signs of soft spots, sagging, or weakened decking that could pose hazards. Companies like Pro-Tech Roofing handle these safety measures as part of their free inspections. If you’re in the Tulsa area, you can visit their office at 1107 N 105th E Ave, Tulsa, OK to schedule an evaluation that meets insurance standards.
Roof Inspection Checklist: What to Examine
When preparing to file an insurance claim, it’s crucial to inspect every part of your roof thoroughly. Overlooking even small areas of damage could lead to delays or a lower settlement. Start with the exterior components you can see, then move on to the structural supports and interior spaces to uncover any hidden issues.
Check Shingles, Flashing, and Gutters
Begin by examining your shingles for signs of wear or damage. Small gaps or cracks can lead to leaks, and shingles that are curling or buckling are often a sign that the roof is nearing the end of its lifespan – especially if it’s been in place for over 20 years.
"If you see missing, cracked, or curled shingles or granules accumulating in your gutters, it’s time to assess." – Joseph Elshazly, President and Chief Marketing Officer, Rapid Restoration Group
Inspect your gutters for shingle granules, which look like sand-like particles. Their presence is a sign that the roofing material is deteriorating and may need replacement. Check the metal flashing around chimneys, skylights, and pipe boots for rust, gaps, or peeling sealant. If damage affects more than 25% of the roof, industry standards typically recommend replacing the entire roof rather than patching individual areas.
| Damage Type | Recommended Action |
|---|---|
| Missing shingles | Replace immediately |
| Cracked shingles | Repair or replace soon |
| Curled shingles | Consider replacement |
| Granule loss | Inspect for overall damage |
| Buckling of shingles | Check for water seepage underneath |
| Rust on flashing | Address immediately to prevent leaks |

Inspect Decking, Ridges, and Valleys
After checking the exterior, evaluate the roof’s structural integrity. Walk around your property and look for sagging or warped sections along the edges, as these could signal deeper issues. Pay close attention to valleys – where two roof planes meet – since they are particularly prone to leaks. Ensure the metal flashing in these areas is intact, with no gaps or corrosion, and that it maintains continuous sealant contact. Ridge caps should also be straight and free of gaps or misalignment.
If you can safely access your attic, inspect for soft spots, delaminated plywood or OSB, and rafter deflection. These issues often point to water damage that should be thoroughly documented for your insurance claim.
Review Interior and Attic Conditions
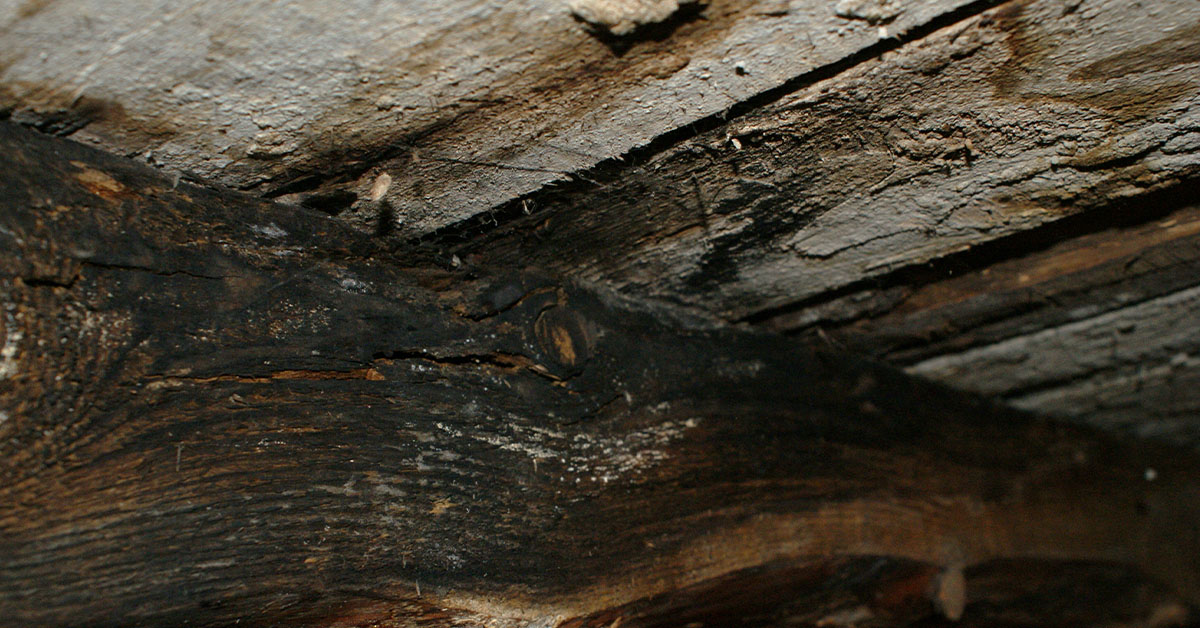
Once the exterior is inspected, move inside to check for hidden damage. Use a flashlight in your attic to look for water stains, mold, or wet insulation. These are clear indicators of leaks. If you’ve been repairing leaks frequently, it’s a strong sign that your roof may be near the end of its life.
"If you’re repairing leaks often, your roof’s probably on its last leg." – Joseph Elshazly, President and CMO, Rapid Restoration Group
Pay close attention to sagging or warped sections near the edges, as these suggest serious structural problems needing immediate professional attention. Carefully document all areas affected by water damage to ensure your insurance claim meets required standards.
For a professional assessment, consider scheduling a free inspection with Pro-Tech Roofing at 1107 N 105th E Ave, Tulsa, OK. Accurate documentation of your findings is essential to building a strong case for your claim.
How to Document Damage for Insurance Claims
Once you’ve completed a detailed roof inspection, the next step is thorough documentation. This step is crucial for solidifying your insurance claim. Acting quickly is key – delays in documenting damage can reduce settlements by as much as 40%.
"Insurance claims are won or lost on evidence." – WeatherShield Roofing
Here’s how to efficiently gather and compile the evidence you’ll need.
Take Clear Photos with Timestamps
Start taking photos as soon as possible, ideally within 24 to 48 hours after the storm. Begin with wide-angle shots that include your home’s surroundings – such as street signs or house numbers – for context. Then, take close-ups of the damage, using a ruler or another object for scale.
Make sure GPS/location services are enabled on your device so that your photos include accurate location data. Use high-resolution, unedited images to ensure they’re credible. To add an extra layer of proof, email the photos to yourself immediately after taking them. The email timestamp can serve as additional evidence of when the pictures were taken.
Don’t forget to document interior damage too. This could include ceiling stains, wet attic insulation, or ground-level damage such as dented AC units or hailstones placed next to a ruler for size comparison. A brief video walkthrough (under five minutes) can also be helpful. Start the video by stating the date, time, and address.
Separate Old Damage from New Damage
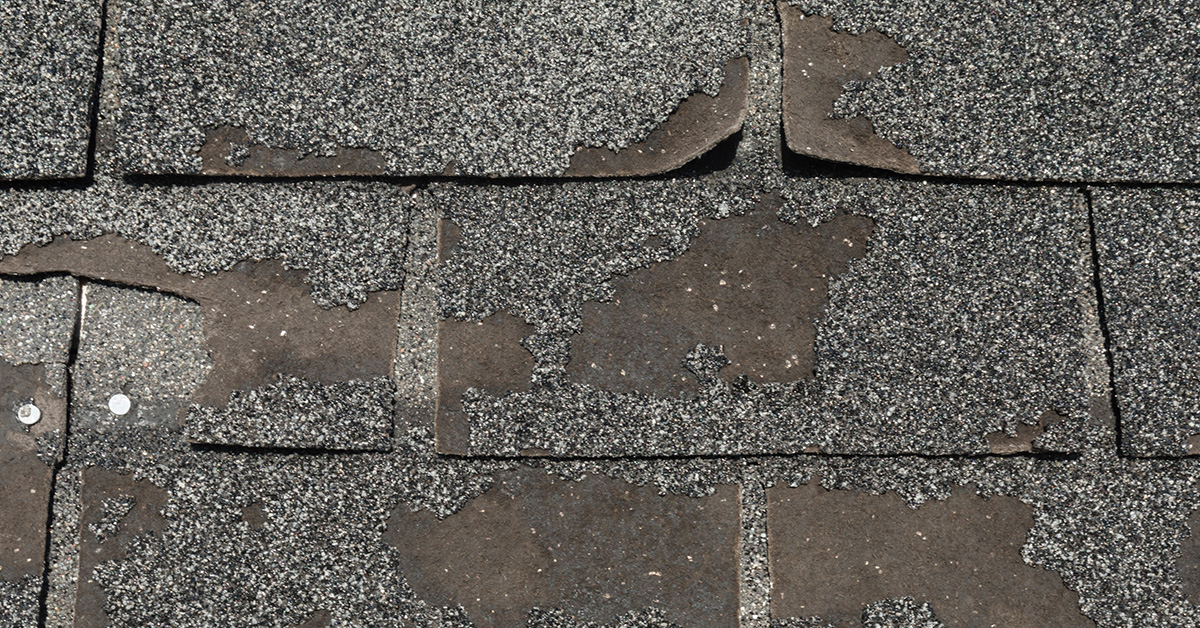
After collecting your images, it’s important to distinguish recent storm damage from older wear and tear. Insurance policies generally cover only recent damage caused by specific events, not pre-existing issues.
- New damage often includes clean edges on missing shingle tabs, dark hail bruises exposing fresh asphalt, or wind-lifted shingles that haven’t resealed.
- Old damage may appear as curling or buckling shingles, brittle textures, heavy granule buildup in gutters, or rust on metal flashing.
If you find fresh debris, such as shingle fragments or downed branches, include these as evidence of recent wind damage. For hailstorms, consider saving a few hailstones in your freezer to show the adjuster as physical proof. You can also strengthen your case by cross-referencing your photos with National Weather Service reports, local radar data, or news coverage to tie the damage to a specific storm date. Keep in mind that most policies require damage to be reported within 30 to 60 days of the event.
| Damage Indicator | Likely New Damage (Covered) | Likely Old Damage (Wear & Tear) |
|---|---|---|
| Shingle Condition | Missing tabs, fresh punctures, clean edges | Curling, buckling, brittle texture, balding |
| Metal Components | Fresh dents in flashing/vents | Rust, corrosion, peeling sealant |
| Gutters | Recent dents, fresh debris | Heavy silt/granule accumulation, sagging |
| Bruising | Dark, soft spots on shingles | Faded spots, weathered appearance |
Create a Detailed Inspection Report
Once you’ve gathered all your evidence, compile it into a well-organized report. Include the property address, the exact date and time of the storm, and the type of weather event (e.g., hail, wind, tornado). Attach wide-angle shots of all roof elevations along with close-ups of specific damage, ensuring each photo includes timestamps and scale references. Don’t forget to include interior damage like ceiling stains or wet insulation and connect it to the exterior damage.
Supplement your report with supporting materials such as National Weather Service storm reports, local news articles, and receipts for emergency repairs you made to prevent further damage. Keep a log of every interaction with your insurance company, noting the date, time, and name of the representative, as well as any reference numbers.
If you’re unsure about preparing your documentation, Pro-Tech Roofing offers free inspections at 1107 N 105th E Ave, Tulsa, OK. They can provide detailed reports designed to meet insurance standards.
"Strong documentation is the single most important factor in a successful roofing insurance claim." – Roofs Wiki

Working with Pro-Tech Roofing for Insurance Inspections
Pro-Tech Roofing simplifies the often-complicated process of insurance inspections. With over 20 years of experience and more than 1,000 roofs installed, they handle everything from thorough documentation to negotiating with insurance adjusters. Their expertise ensures every step is managed with precision.
Their process is systematic and covers all key roof components: shingles, flashing, gutters, penetrations, attic conditions, and structural supports. Each inspection report includes detailed photographs and descriptions, giving adjusters clear, visual evidence of the roof’s condition. They also utilize advanced tools like infrared thermal imaging, which costs between $400 and $600 for residential properties, to detect hidden moisture. This is further confirmed using moisture meters, ensuring the data is accurate and reliable.
"Documented professional inspections provide evidence supporting insurance claims for storm damage. Reports include detailed photographs, measurements, and written assessments that adjusters rely on." – Pro-Tech Roofing
Pro-Tech Roofing stays up to date with evolving insurance requirements and state regulations. They ensure all forms are submitted in the correct formats and organize their findings into three priority levels: immediate concerns (e.g., active leaks), short-term recommendations (repairs needed in the next 6–12 months), and long-term maintenance suggestions. This clear prioritization helps both you and your adjuster make informed decisions about repairs.
This commitment to detail has earned them a strong reputation. Pro-Tech Roofing offers free inspections at 1107 N 105th E Ave, Tulsa, OK. With a 5/5-star rating, GAF certifications, and a BBB A+ rating, they consistently meet insurance documentation standards, ensuring your claims are supported with accurate and professional reports.
FAQs
What should I include in a roof inspection report for insurance?
When preparing a roof inspection report for insurance purposes, it’s important to provide a clear and thorough assessment of the roof’s condition. The report should cover several key areas to ensure all aspects are documented:
- Overall Condition: Look for signs of leaks, damage, or wear that could affect the roof’s performance.
- Vegetation, Debris, and Water: Check for plant growth, accumulated debris, or standing water that could lead to long-term issues.
- Perimeter and Flashing: Inspect the roof’s edges and flashing to identify any gaps, deterioration, or other vulnerabilities.
- Penetrations: Evaluate features like skylights, chimneys, or vents to ensure they are properly sealed and free of damage.
- Rooftop Equipment: Confirm that any equipment on the roof is secure, stable, and functioning as intended.
Including photos alongside detailed notes is essential for accuracy and credibility. This visual evidence can help clarify observations and provide additional context for the insurer.
Should I inspect the roof myself or hire a pro?
Hiring a professional for roof inspections is often the smartest choice, particularly when dealing with insurance claims. While homeowners can handle basic visual checks, spotting issues like leaks, damage, or structural concerns usually requires a trained eye. Professionals not only have the right tools but also the expertise to conduct a detailed inspection that aligns with insurance requirements and helps maintain the roof’s condition over time.
How do I prove the damage is from this storm?
To demonstrate storm-related roof damage, start by documenting any visible problems such as cracks, missing shingles, or damaged flashing. Be thorough with your photos, focusing on areas affected by debris or strong winds. Also, look for signs like ponding water, accumulated debris, or even unexpected vegetation growth. Comparing the roof’s current state with past inspection reports or older photos can strengthen your case. Don’t forget to reference recent weather events to tie the damage directly to the storm, which can be crucial for your insurance claim.