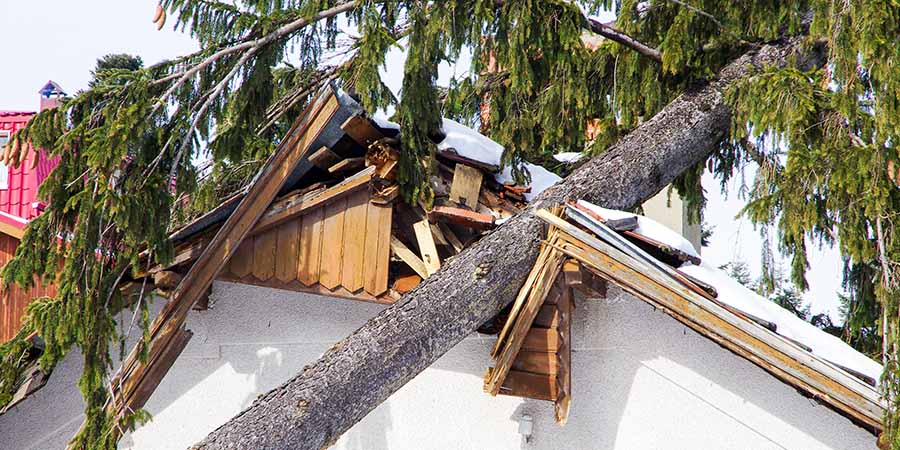
When severe weather hits Tulsa, your roof and home can sustain hidden damage that leads to costly repairs if not addressed quickly. To protect your property:
- Inspect your roof and surroundings: Check for missing shingles, damaged flashing, and debris on the ground.
- Examine gutters and downspouts: Look for clogs, sagging sections, and granule buildup.
- Check inside your home: Look for water stains, mold, or sunlight peeking through attic cracks.
- Take safety precautions: Use proper gear like non-slip shoes and binoculars for inspections.
- Act fast with temporary fixes: Cover damaged areas with tarps and clear gutters to prevent further issues.
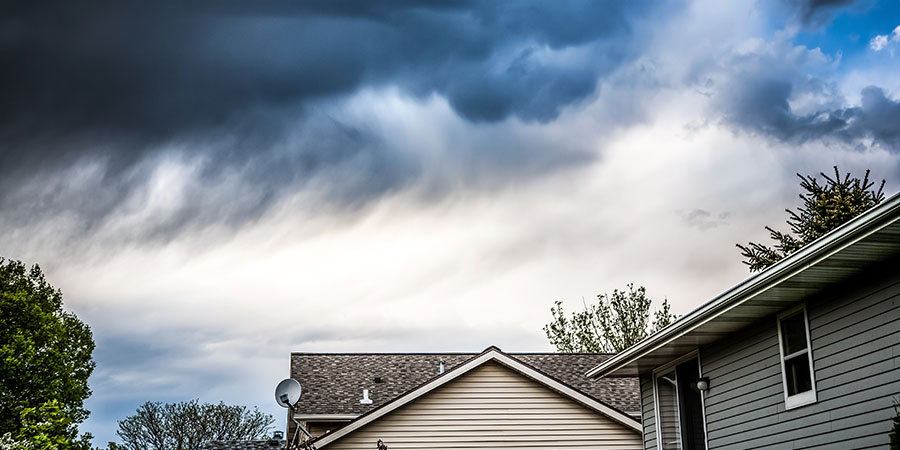
If the damage is beyond your expertise, contact a certified roofing professional for a detailed inspection and repairs. Addressing storm damage within 48–72 hours is key to preventing long-term problems.
What To Do After a Storm: Roof Damage Inspection Guide
Safety Steps Before You Check Your Roof
Before stepping out to assess storm damage, make sure your safety comes first. Jumping into an inspection without taking the right precautions can turn a manageable situation into a risky one. Follow these steps to conduct a safe and effective inspection.
Wait for Clear Weather and Look for Hazards
Never inspect your property during an active storm or under unstable conditions. Wait until the wind dies down and the rain stops – wet surfaces can be dangerously slippery.
Start by observing your surroundings from a safe distance to identify any potential risks. Watch for loose or shifting debris that could cause harm. Once you’re confident the area is safe, gather your protective gear before approaching any damaged areas.
Gear Up with the Right Safety Equipment
Having the proper safety gear is essential for inspecting storm damage. Equip yourself with non-slip shoes, safety glasses, gloves, and a hard hat.
Choose footwear with solid tread and good ankle support. Avoid sandals, flip-flops, or smooth-soled shoes – they can easily slip on wet or uneven surfaces. Safety glasses protect your eyes from debris, while gloves safeguard your hands from sharp or rough materials.
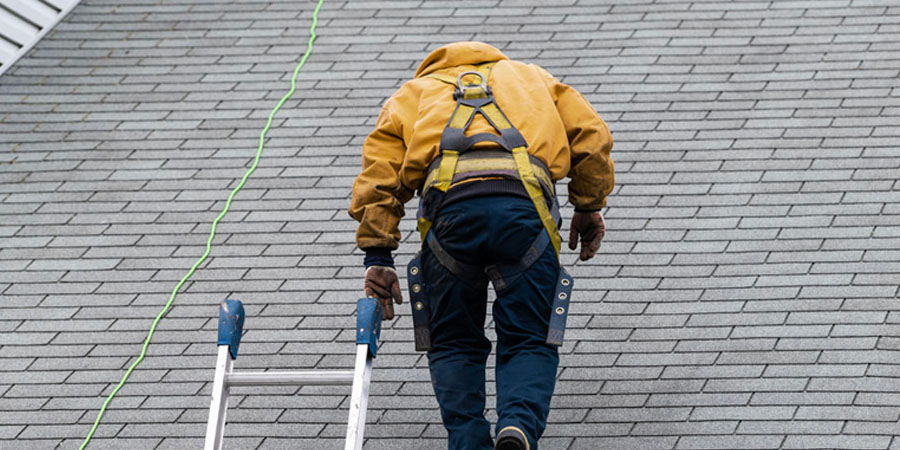
A hard hat or safety helmet can shield you from falling debris. For a closer look at hard-to-reach areas, consider binoculars or even a drone. Bring a flashlight or headlamp for dimly lit spots, and use a camera or smartphone to document any damage.
Begin with a Ground-Level Inspection
Start your assessment from the ground – it’s a safer way to spot obvious damage without climbing onto potentially unstable surfaces.
Walk around your home and scan the roofline for missing shingles, bent flashing, or sagging areas. Use binoculars to get a closer view of anything that looks suspicious. This can help you spot damage that might not be visible at first glance.
Keep an eye out for roofing materials that may have fallen to the ground. Pieces like shingle granules, flashing, or other debris scattered around your yard can be a sign of damage above.
If you can’t confirm the extent of the damage from the ground, proceed cautiously with a ladder. Make sure it’s stable and equipped with levelers or stabilizers. However, many times a thorough ground-level inspection is enough to decide whether you need to call in a professional.
How to Check Your Roof from the Outside
Once you’ve safely inspected your roof from the ground, it’s time to take a closer look at its exterior for any signs of damage.
Look for Missing or Broken Shingles
One of the easiest damage indicators is missing shingles. Walk around your house and examine the roof from all angles. Bare patches where shingles are missing expose the roof deck underneath, leaving your home vulnerable.
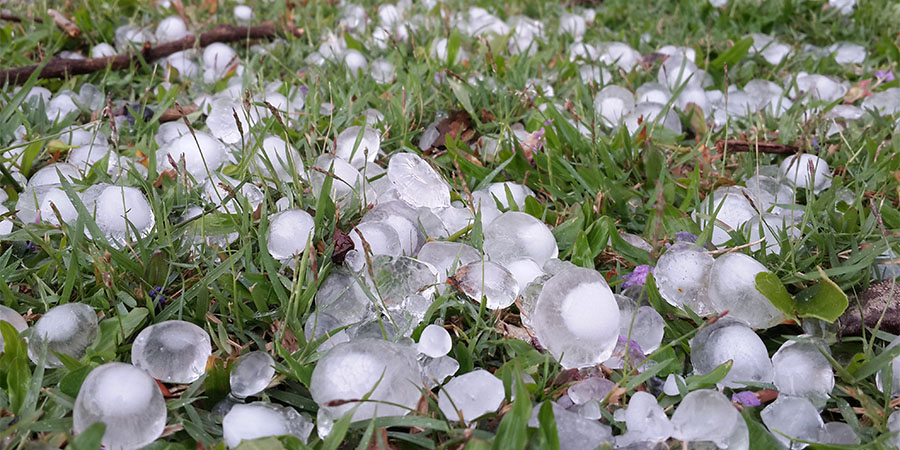
Next, check for cracked or split shingles. These often appear as dark lines, dents from hail, or edges that curl upward. Also, keep an eye out for granule loss – a common issue with asphalt shingles after severe weather. When granules are stripped away, you’ll notice shiny or dark spots on the shingles, which weakens their ability to shield against UV rays and water.
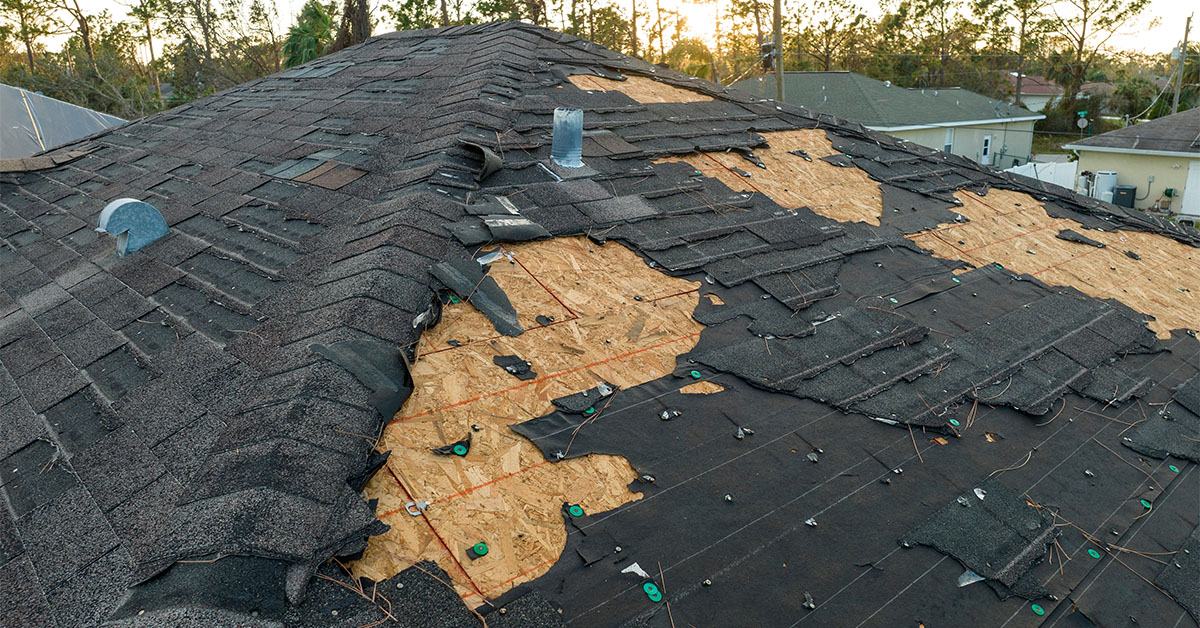
Check for loose or lifted shingles, too. These may still be attached but have pulled back from the roof deck, creating gaps that allow water to seep in. Shingles that look like they’re flapping or sitting unevenly compared to others are clear signs of this problem.
Finally, inspect the flashings around key roof features for any signs of damage.
Check Flashing Around Roof Features
Flashing is the thin metal installed around roof penetrations like chimneys, vents, and skylights. It’s designed to direct water away from vulnerable areas, making it critical to examine after a storm.
Start with the chimney flashing. Look for pieces that appear bent, dented, or displaced. Storm winds can twist these metal sections, leaving gaps for water intrusion. If you see rust or corrosion, especially on older flashing, it could indicate weak spots that worsened during the storm.
Around vent pipes and exhaust fans, ensure the flashing lies flat against both the roof and the vertical structure. Notice any gaps or separations, as these can quickly turn into leaks. Also, check the rubber boots or seals around vents for cracks or tears.
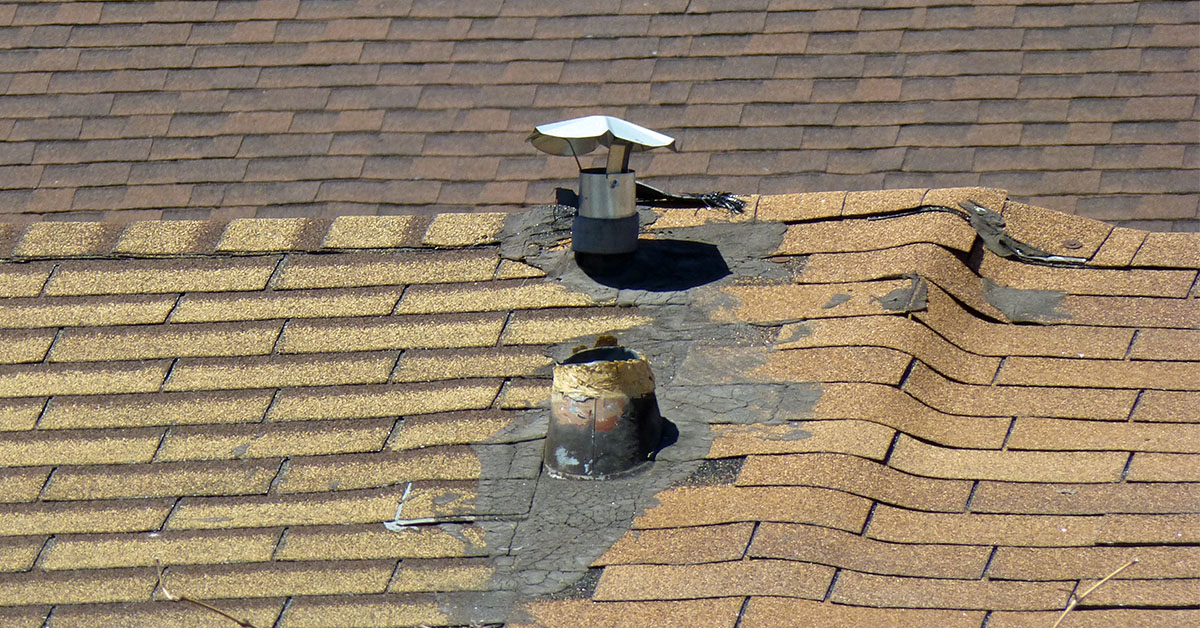
When inspecting skylight flashing, pay close attention to any pooling water near the skylight base or areas where the flashing has separated from the roof or skylight frame. Skylights require more intricate sealing, so even minor damage here can lead to bigger issues.
Once you’ve reviewed these areas, shift your focus to the gutters and downspouts.
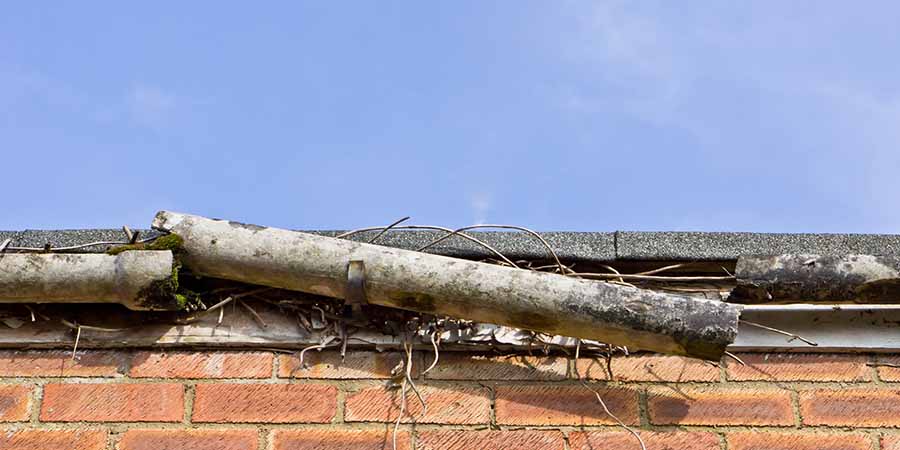
Inspect Your Gutters and Downspouts
Your gutters often take the brunt of storm damage and can provide clues about your roof’s condition. Start by checking for sagging or pulling away from the roofline. Storm debris and heavy water loads can stress the brackets, causing gutters to detach.
Look inside the gutters for excessive granules. While some granule loss is normal, a sudden buildup – especially of brighter, fresh granules – signals significant roof damage.
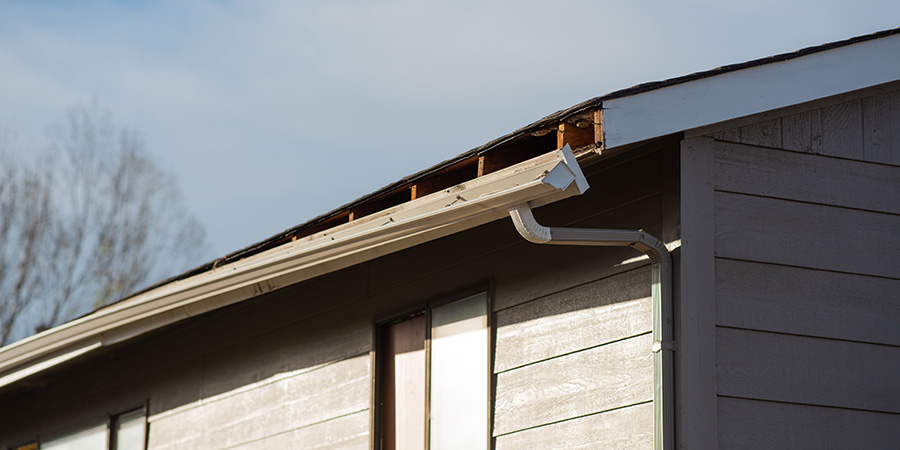
If you notice dents in metal gutters, it could mean hail has impacted both the gutters and your roof. Also, confirm that downspouts are still securely attached and functioning properly.
Clear any clogs caused by leaves, branches, or other debris, as these can cause water to overflow and damage your home’s foundation or siding. Even if the gutters themselves seem intact, blockages can lead to bigger issues if not addressed quickly.
Finally, check for standing water in the gutters. This could mean the slope has shifted due to loose hardware, or that downspouts are blocked or disconnected, preventing proper drainage. Addressing these issues promptly can save you from dealing with more extensive damage later.
Checking Inside Your Home for Hidden Damage
Once you’ve inspected your roof’s exterior, it’s time to turn your attention indoors. Hidden storm damage inside your home can lead to bigger problems if left unchecked. Start by looking for visible signs of water damage.
Spotting Water Stains on Ceilings and Walls
Water stains are one of the clearest indicators of roof damage inside your home. Walk through each room and carefully examine the ceilings for brown or yellow patches that might feel damp. These stains often point to water seeping through your roof.
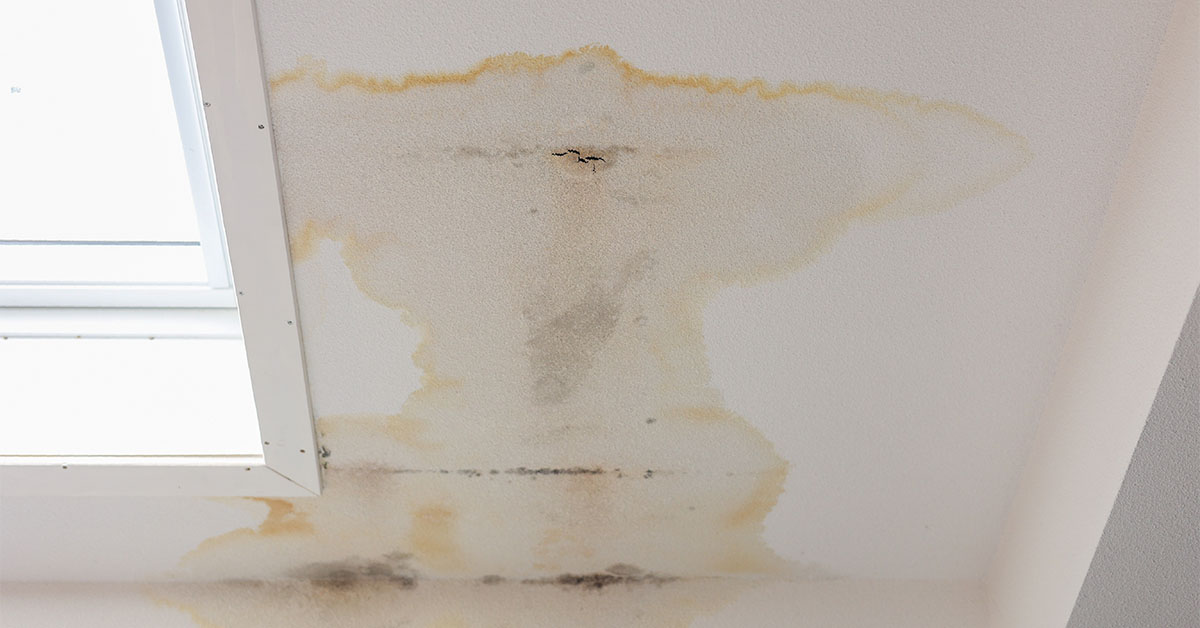
Focus on areas beneath any obvious exterior damage. Look for streaks or bubbling paint on the walls, especially in corners where the ceiling meets the walls. These patterns suggest water has been trickling down from above.
Don’t skip inspecting areas around light fixtures and ceiling fans. If you spot moisture near electrical fixtures, turn off the power to that section of your home immediately and contact a professional for assistance.
Inspecting Your Attic for Water and Air Leaks
Your attic can reveal a lot about the condition of your roof after a storm. Use a flashlight to check the darkest corners for wet spots or water stains.
Inspect during daylight hours if possible. Look for sunlight streaming through cracks or holes in the roof decking – a clear sign of openings where water could enter during future storms.
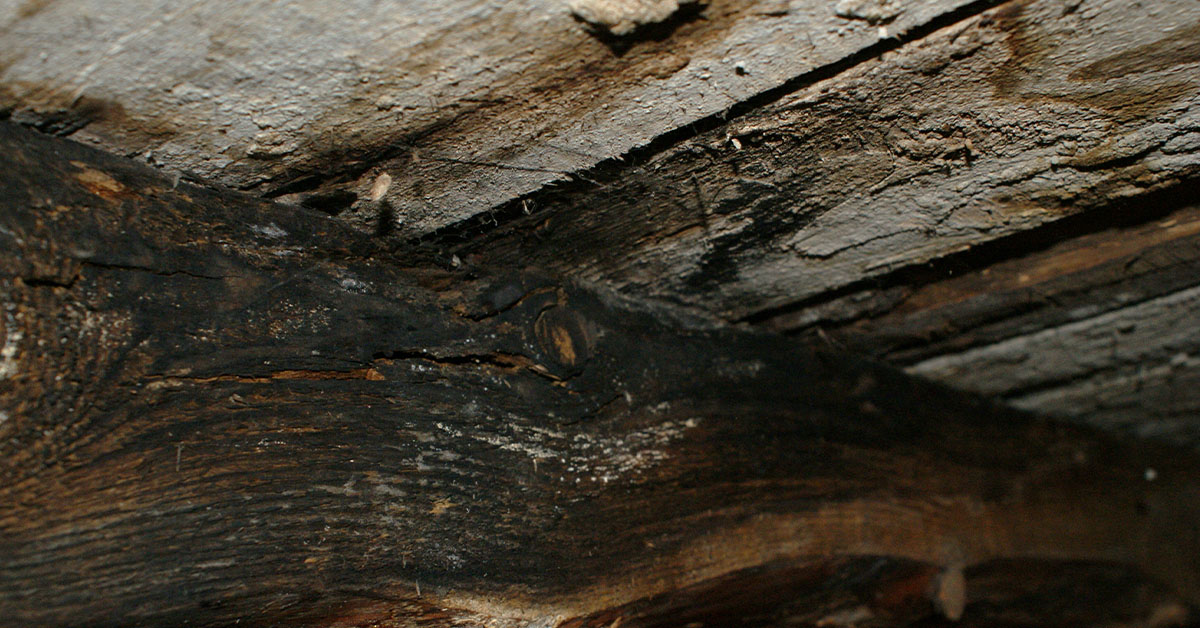
Examine the rafters and trusses for any signs of damage or misalignment. Storms can cause these structural elements to shift, leading to gaps or weaknesses. Also, check for missing or loose insulation, which could indicate water damage or wind infiltration.
Pay close attention to areas around vents, chimneys, and other roof penetrations, as these are common weak spots. If you notice a musty odor, it could mean water has seeped in, creating an environment for mold or mildew growth. This smell is a warning sign that moisture has entered your attic.
Checking for Signs of Pest Entry
Storm damage can create new entry points for pests, so it’s important to check for any signs of unwanted visitors. Look for droppings, grease marks, or nesting materials in attics, crawl spaces, or other secluded areas of your home.
Be alert for sounds like scratching, scurrying, or gnawing coming from walls, ceilings, or attics, especially at night. Storms often drive animals to seek shelter in damaged areas.
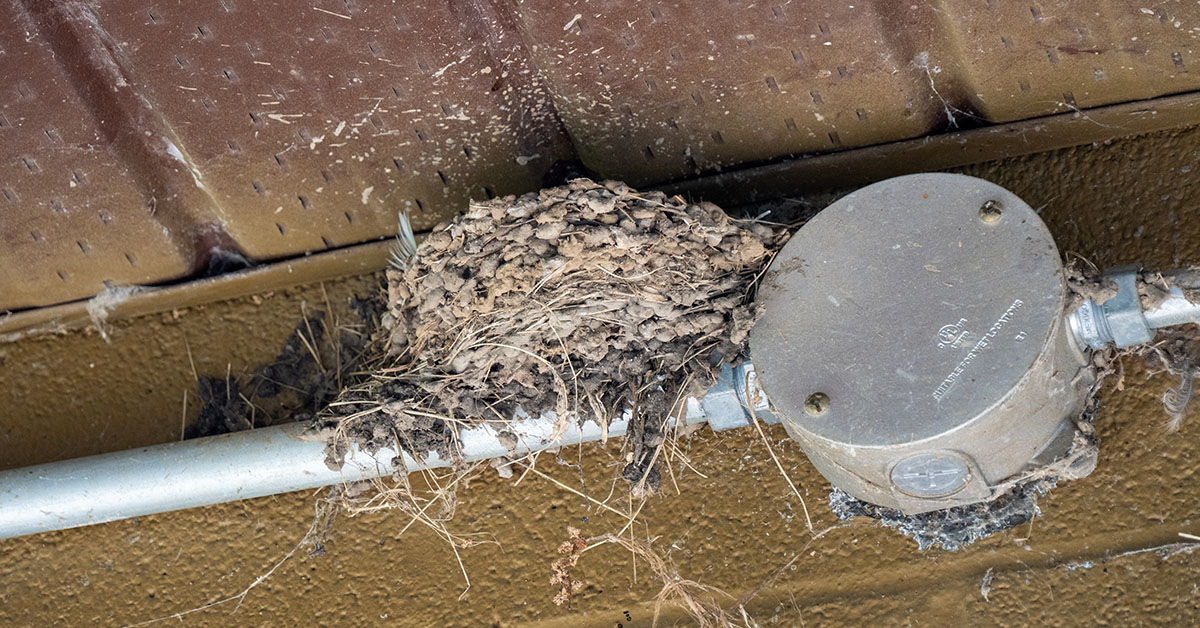
Inspect your attic for chewed electrical wires or wood damage, as rodents are known to gnaw on these materials. This not only harms your home’s structure but also poses a fire risk.
Feel for drafts in places where you didn’t notice them before. Unexpected air currents could signal new gaps in your home’s structure that pests might exploit. Similarly, water stains on walls or ceilings could indicate openings that attract animals searching for water.
Lastly, watch for nesting materials like shredded paper, fabric, or insulation. Fresh nests in hidden corners are a sign that pests have recently taken advantage of storm-created entry points.
sbb-itb-66ccccd
Quick Fixes to Stop More Damage
Once you’ve spotted damage during your inspection, it’s crucial to act fast. Temporary fixes can help protect your home and prevent smaller issues from snowballing into major repairs while you wait for the professionals to step in.
Cover Damaged Areas with Tarps
For damaged roof sections, heavy-duty 6 mil thick blue poly tarps are a reliable choice. A 20-foot by 30-foot tarp is usually large enough to cover most residential damage.
Start by measuring the damaged area and add 4 feet on each side for proper overlap. Lay the tarp so it extends well beyond the damage, ensuring water flows off safely. To secure it, use 2-inch by 4-inch wooden boards along the edges. Nail through the boards into the roof decking every 12 inches – this "sandwich boarding" technique keeps the tarp in place even in windy conditions. Avoid using just nails or staples, as they won’t hold up.
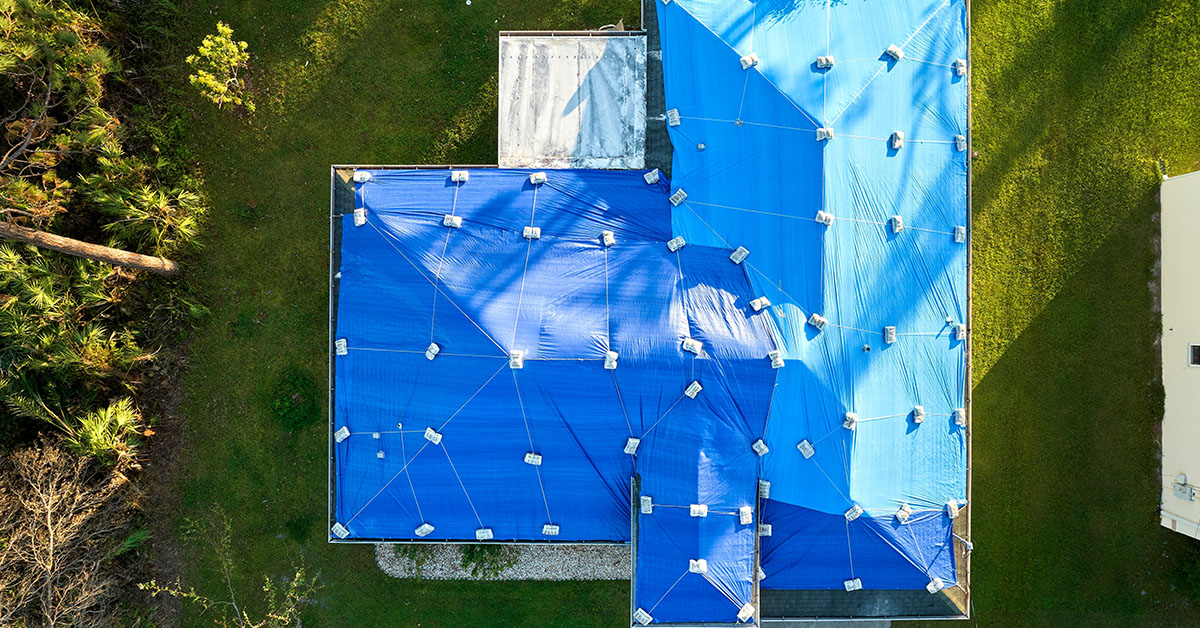
Around chimneys or vents, carefully cut the tarp and seal the edges with roofing cement. Apply a thick layer of cement around these penetrations to keep water out. Keep in mind that tarps are a temporary solution, typically lasting 30 to 90 days depending on the weather.
Clean Out Gutters and Downspouts
Storm debris like leaves, branches, and shingle granules can clog gutters, leading to water backups that damage your roof, siding, and even your foundation. Clearing these blockages is a simple but important step.
Start by removing debris by hand from the downspout end of each gutter. Use a plastic scoop or small garden trowel to avoid scratching the surface. Then, flush the gutters with a garden hose to ensure proper drainage.
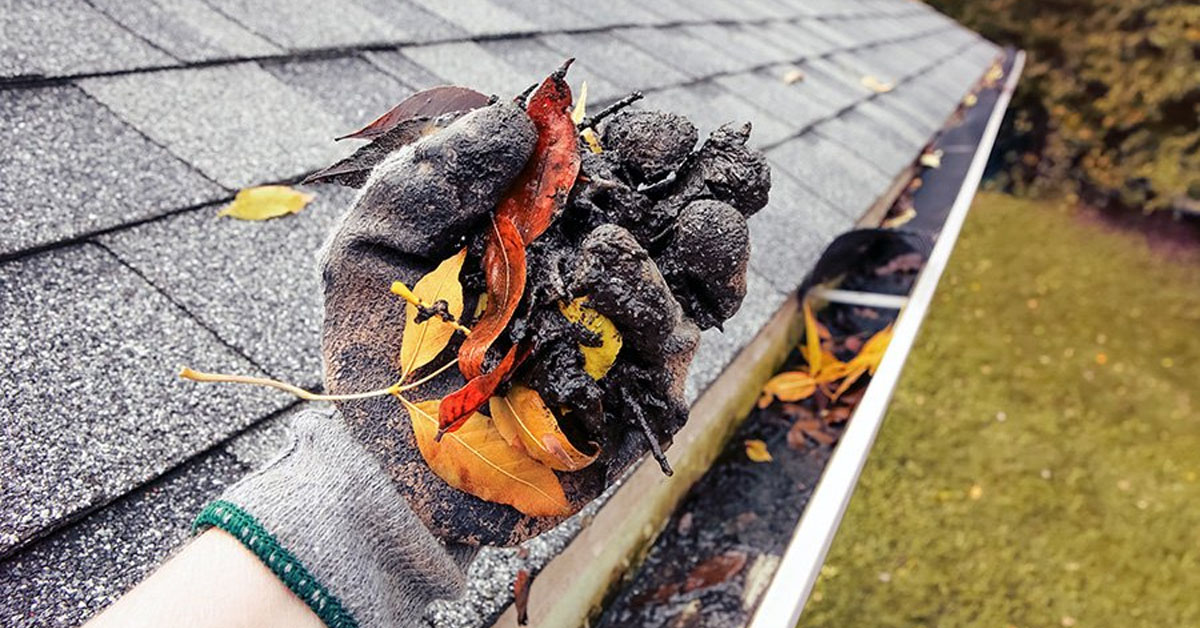
Pay extra attention to downspout connections, as clogs often occur there. If water isn’t flowing freely, detach the downspouts and clear blockages using a plumber’s snake or a high-pressure hose. Make sure downspouts direct water at least 6 feet away from your foundation – storm winds can sometimes disconnect extensions, so double-check their placement.
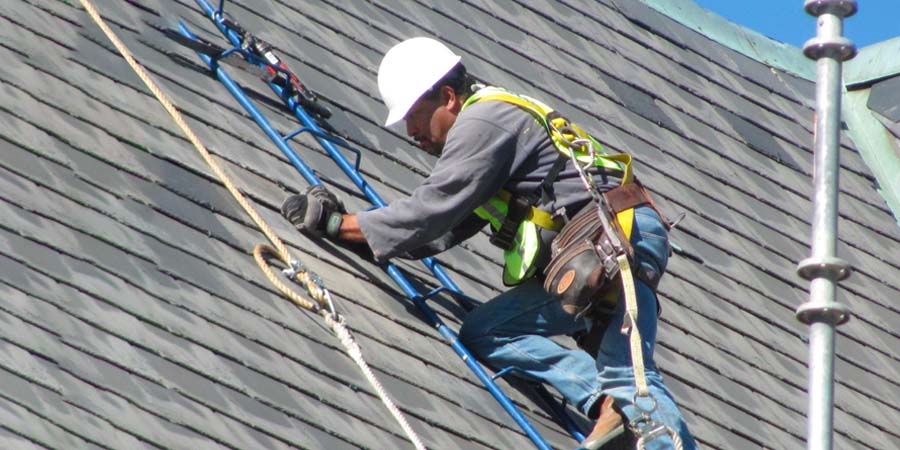
Stay Away from Dangerous Repairs
Certain repairs are best left to professionals, especially when safety is at risk. Never climb on wet or damaged roofs, as they can be incredibly slippery, and hidden structural damage could make them unstable. Avoid attempting repairs on electrical systems, structural components, or gas lines – these require specialized skills and tools.
Be particularly cautious around damaged flashing near chimneys or sagging roof sections, as these areas can be hazardous without the right equipment and training. If you notice signs like the smell of gas, electrical sparks, or visible structural sagging, evacuate immediately and call emergency services. Similarly, if you see water near electrical fixtures, turn off the power at your circuit breaker – if it’s safe to do so – and contact a professional right away.
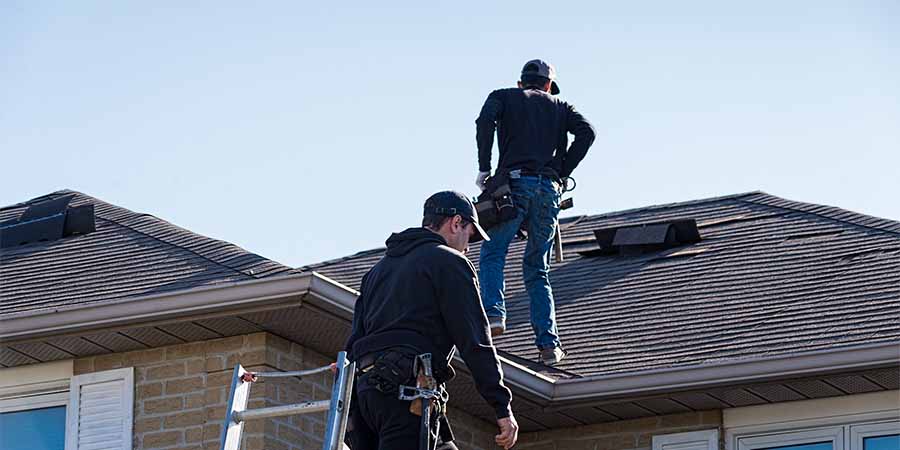
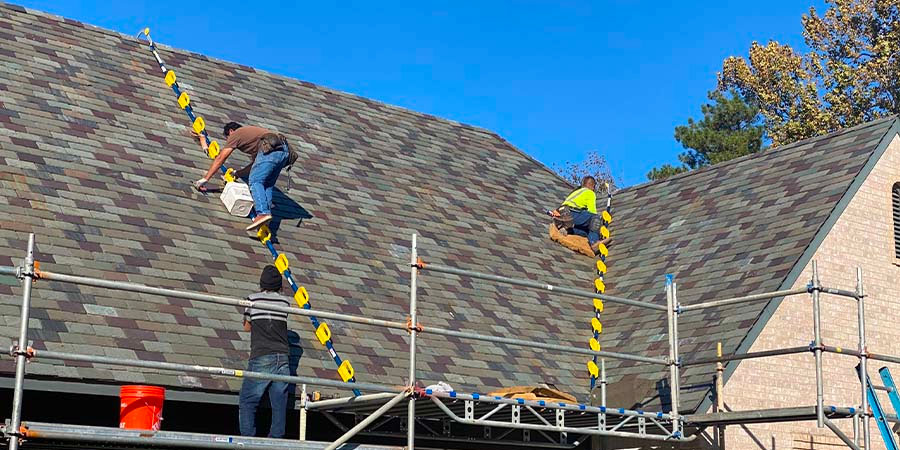
Stick to safe, temporary measures like tarping and clearing debris. Remember, professional roofers have the tools and experience – including harnesses and non-slip shoes – to handle complex and dangerous repairs safely.
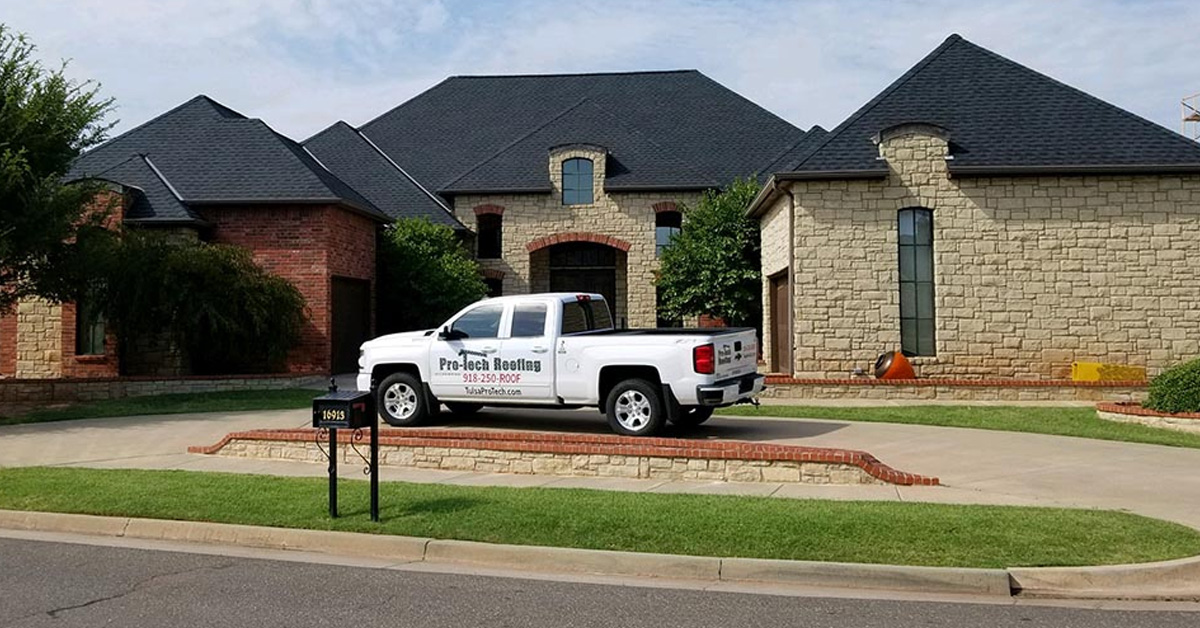
When to Call Pro-Tech Roofing for Help
Quick fixes might hold you over for a little while, but some roof issues require the expertise of certified professionals. Pro-Tech Roofing ensures your home is protected with repairs that are safe, meet building codes, and safeguard your investment.
Recognizing the Need for Professional Assistance
If you spot signs of water damage or suspect your roof has taken a hit after a storm, it’s time to bring in the experts. Even small leaks or subtle changes in your roof’s appearance can point to more serious underlying problems.
Instead of risking further damage with DIY attempts, let a professional assess the situation.
Free Roof Inspections by Pro-Tech Roofing
Pro-Tech Roofing provides free, thorough roof inspections that go far beyond a simple visual glance. Their certified technicians use specialized tools to examine your roof, document any damage with detailed photos and measurements, and deliver a comprehensive report to support insurance claims.
This thorough evaluation lays the groundwork for repairs that align with industry standards.
Why Choose a Certified Roofing Company?
Choosing a certified roofing company ensures your repairs are done right and comply with local regulations. Pro-Tech Roofing holds certifications from GAF and Owens Corning, which highlight their dedication to ongoing training, strict installation practices, and high-quality materials. Partnering with a certified team means you’ll benefit from:
- Insurance and bonding that protect you from liability.
- Expert guidance to simplify your insurance claims process.
- Repairs that meet all local building codes.
Based in Tulsa, Pro-Tech Roofing brings a deep understanding of Oklahoma’s unpredictable weather. Their local expertise allows them to create repair strategies tailored to protect your home from future storms.
Protecting Your Home After Storm Damage
After handling initial quick fixes, it’s important to take additional steps to safeguard your home until permanent repairs can be made. These temporary measures play a key role in preventing further damage. Once you’ve secured your property, keep an eye out for any signs of deeper problems that might need attention.
Given Tulsa’s unpredictable weather, staying proactive is essential. If your home has suffered significant damage or water intrusion, reach out to a certified roofing professional. Many offer free roof inspections, which can help uncover hidden issues and prevent them from escalating into more serious problems.
FAQs
What steps should I take if I notice water stains or mold in my home after a storm?
If you spot water stains or mold in your home after a storm, it’s crucial to take immediate action to reduce damage and avoid potential health issues. Start by drying out the affected areas as quickly as possible. Use fans or dehumidifiers to remove moisture, and get rid of water-damaged materials like soaked drywall or carpets. To stop mold from spreading, clean surfaces with a solution like vinegar or a diluted bleach mixture.
If water problems persist, inspect your home for leaks in the roof or plumbing and fix them right away to prevent more damage. For widespread mold growth or situations you’re unsure how to manage, it’s a good idea to reach out to a professional. They can handle the problem safely and effectively. Acting quickly not only protects your home but also helps keep your family safe.
How can I check my roof for storm damage safely on my own?
You can safely examine your roof from the ground by using binoculars to spot missing, cracked, or curled shingles – all of which can be signs of storm damage. Take a walk around your house to look for debris, sagging sections, or damaged flashing, and check your gutters for granules or debris that might point to shingle wear.
Inside your home, head to the attic and look for leaks, water stains, or damp insulation, as these could indicate hidden issues. Always keep safety in mind – avoid climbing onto the roof unless you have the right training and equipment. If you’re uncertain about the damage or notice anything concerning, reach out to a professional roofing service for a thorough inspection.
When should I call a professional roofing service after a storm?
If you spot signs of serious roof damage after a storm, it’s crucial to reach out to a professional roofing service right away. Keep an eye out for missing shingles, leaks, or structural problems – these issues can escalate quickly if not addressed. Acting promptly can save you from bigger headaches like water damage or weakened structural support.
Not sure how bad the damage is? Or maybe climbing up to check feels unsafe? That’s where an expert comes in. Professionals can spot hidden problems that aren’t visible from the ground and provide the right repairs to keep your home protected.