Maintaining your roof year-round can save you thousands in repairs and extend its lifespan. Each season brings unique challenges – storms, heat, falling debris, and snow – that can damage your roof. This guide breaks down seasonal checklists to help you catch problems early, keep your home safe, and avoid costly repairs.
Key takeaways:
- Spring: Inspect for winter damage, clean gutters, and check for leaks.
- Summer: Address heat damage, check ventilation, and remove pest nests.
- Fall: Clear gutters, inspect shingles, and prepare for winter storms.
- Winter: Safely remove snow, prevent ice dams, and monitor for storm damage.
If any issues feel beyond your expertise, contact a professional roofing service for inspections and repairs. Proactive care protects your investment and ensures your roof stays in top condition.
Roof Maintenance: A Checklist For Preventative Maintenance
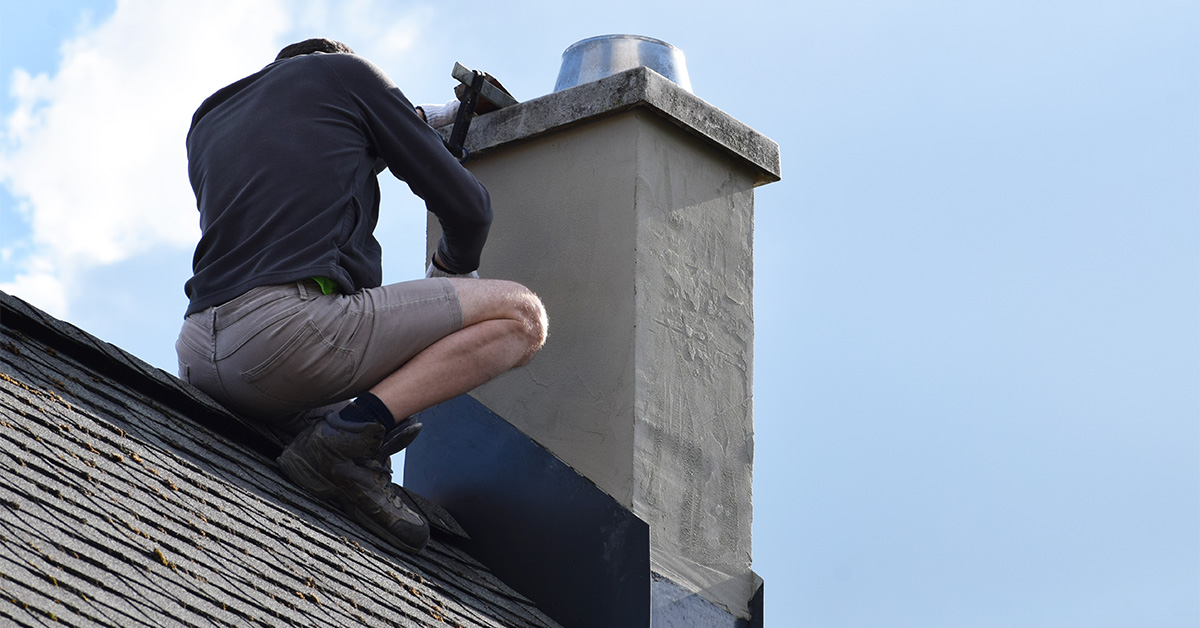
Tools and Safety Equipment You Need
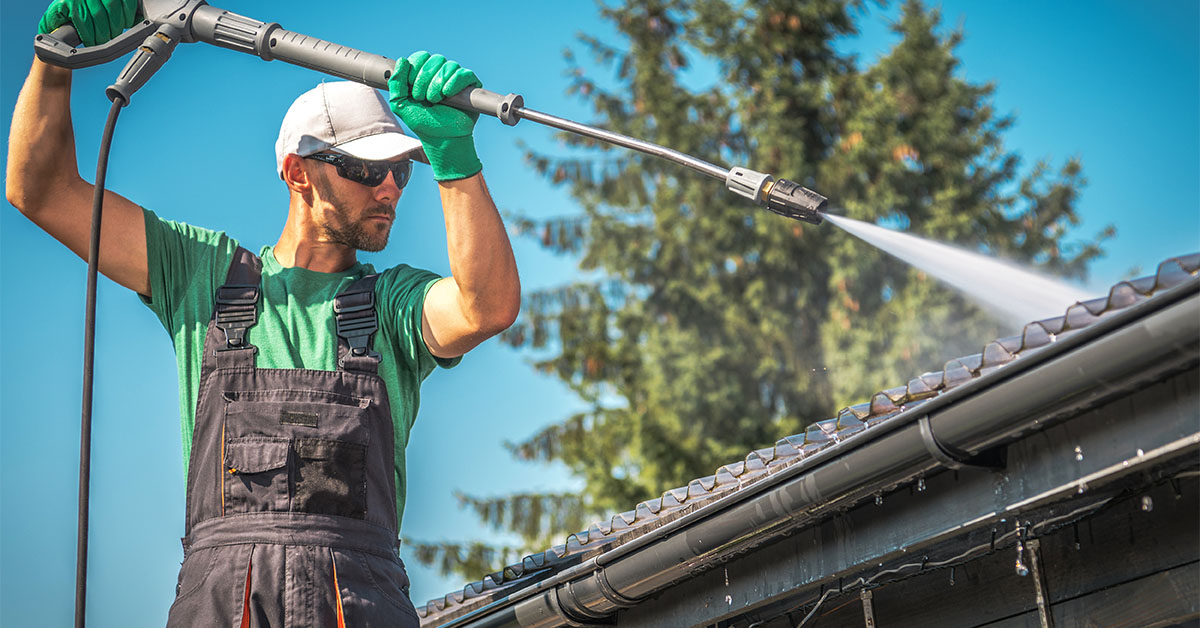
Before heading up to check your roof, having the proper tools and safety gear is critical. The right equipment can mean the difference between a smooth inspection and a potential accident. Most roof maintenance tasks require simple, affordable tools you can find at your local hardware store.
Essential Tools for Roof Inspections
First, a sturdy extension ladder is a must. Choose one that extends at least three feet beyond the roof edge, can safely hold your weight along with any tools, and is set at a 75° angle (position the ladder base 1 foot out for every 4 feet of height).
A pair of binoculars can help you spot potential issues from the ground without having to climb up right away. This is especially useful for identifying things like missing shingles or debris.
If you do need to work on the roof, bring along work gloves, a flashlight or headlamp, a measuring tape, and a camera or smartphone to document any damage you find. For tasks like gutter cleaning, tools such as a gutter scoop, a hose with a spray nozzle, and a bucket or tarp will come in handy. An extendable roof rake is a great option for clearing snow or leaves without stepping onto the roof.
It’s also wise to have a basic tool kit ready. Include items like a hammer, a screwdriver set, a utility knife, and a caulk gun. Roofing cement and matching replacement shingles can be lifesavers for quick fixes.
Safety Gear and Precautions
Working on a roof can be risky – each year, 300–400 construction workers in the U.S. suffer fatal falls. For homeowners without professional training, the risks can be even greater.
Start with non-slip shoes that have rubber soles to provide better traction. Avoid working on your roof during wet, icy, or windy conditions, as these significantly increase the chances of slipping. Be especially cautious if your roof has a steep pitch.
Safety harnesses and roof anchors are essential, but only if you know how to use them properly. If you’re unsure, it’s safer to call in a professional.

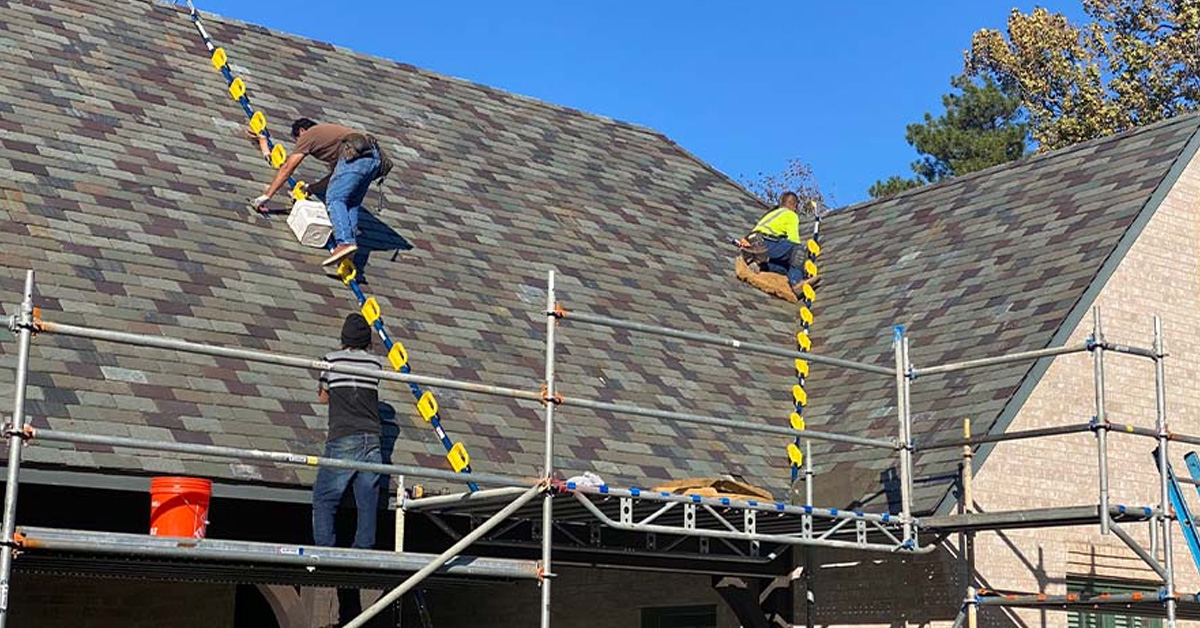
If the task feels beyond your skill level or comfort zone, don’t hesitate to seek professional help (see the section on ‘When to Call a Professional’). Complex problems like severe leaks, structural damage, flashing issues, or storm-related destruction are best left to experts.
Certain roofing materials, such as clay tiles, metal, or flat roofs, require specialized knowledge and tools. Attempting DIY repairs on these can sometimes void warranties or complicate insurance claims.
Also, consider the age and condition of your roof. If it’s reaching the 20–30 year mark, a professional inspection can help determine whether minor repairs will suffice or if larger-scale work is needed.
Professionals have the experience and tools to spot hidden issues and perform repairs that last. What might appear to be a simple fix could actually signal a deeper problem that only a trained eye can catch.
With the right tools and safety measures in place, you’re ready to tackle seasonal roof inspections, starting with spring maintenance.
Spring Roof Maintenance Checklist
Spring is the perfect time to assess any damage your roof may have sustained during the harsh winter months. Snow, ice, and fluctuating temperatures can take a toll, and catching problems early can save you from costly repairs later. A thorough inspection, combined with proper cleaning and maintenance, keeps your roof in top shape as the warmer months approach.
Check for Winter Damage
Start by inspecting your roof for signs of wear and tear caused by winter weather. Look for cracked, loose, or missing shingles, as freeze-thaw cycles can cause cracks to widen and weaken adhesive strips over time.
Walk around your property to check for exposed underlayment, curled shingle edges, or areas where granules are missing. Granules protect shingles from UV rays, so heavy granule loss might mean it’s time to consider replacing them.
Pay special attention to metal flashing around chimneys, vents, and skylights. Look for gaps, loose nails, rust, or areas where caulking has cracked or pulled away. These are common places for leaks to develop.
Don’t forget to inspect your attic. Use a flashlight to check for water stains on rafters or insulation. Fresh stains will appear darker, while older ones may look faded. Even small leaks can lead to significant structural issues if left untreated, so mark any problem spots for immediate repairs.
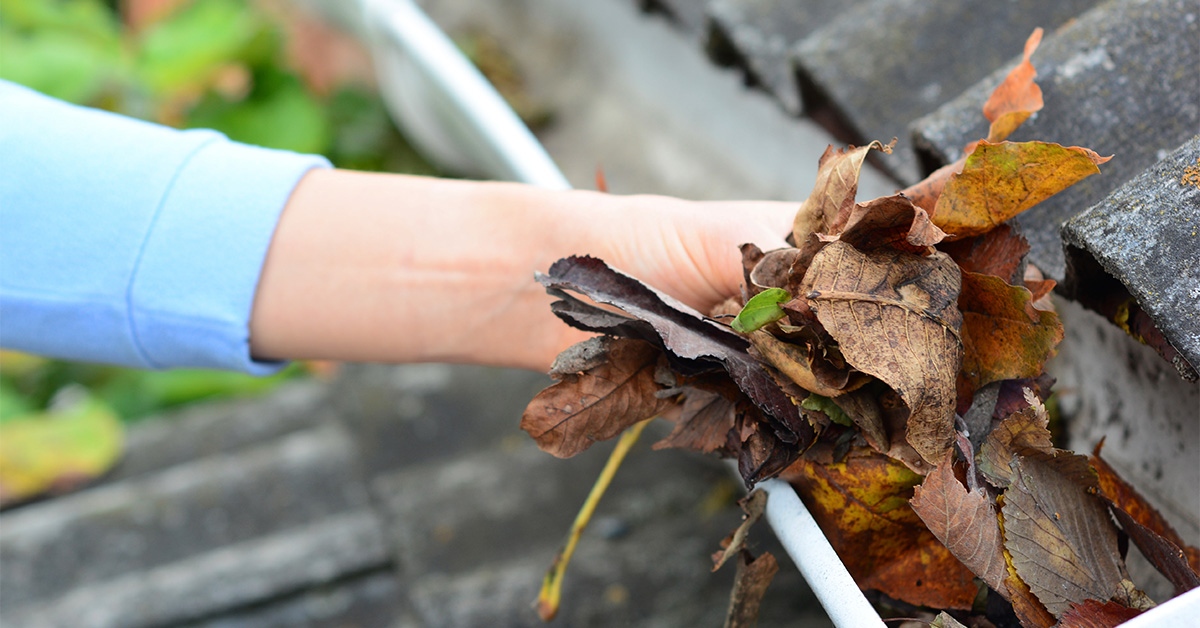
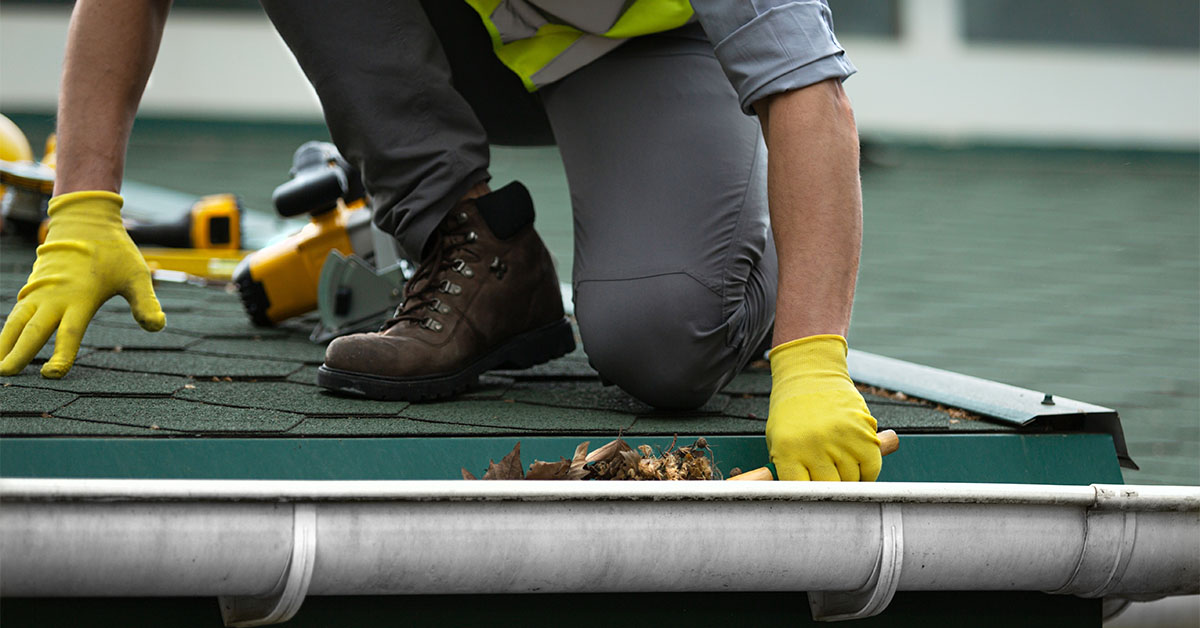
Clean Gutters and Remove Debris
Once you’ve assessed winter damage, shift your focus to cleaning out gutters and clearing debris from your roof. Winter storms often leave behind leaves, twigs, and other debris that can clog gutters and disrupt proper drainage. Clogged gutters can cause water to back up under shingles or overflow near your foundation, leading to issues both above and below.
Use a gutter scoop and gloves to remove debris, starting at the downspout and working your way through each section. Pay close attention to where gutters connect to downspouts, as these areas tend to collect the most buildup.
After removing debris, flush the gutters with a garden hose to ensure water flows smoothly. This step also helps identify any remaining clogs or areas where water pools, which could indicate sagging gutters that need adjustment.
For debris on the roof itself, use a roof rake from the ground whenever possible. If you need to get on the roof, carefully remove debris by hand to avoid damaging shingles.
Finally, check that your downspouts direct water at least six feet away from your home’s foundation. Winter frost can shift extensions or splash blocks, so reposition them to prevent water from pooling near your basement or crawl space during spring rains.
Eliminate Moss, Algae, and Mold
As spring brings moisture and warmer temperatures, it also creates the perfect environment for moss, algae, and mold to thrive. These growths not only detract from your roof’s appearance but can also cause lasting damage if left untreated.
Algae often appears as dark streaks on your roof, especially on north-facing slopes that get less sunlight. While algae itself doesn’t immediately harm shingles, it can trap moisture and reduce your roof’s ability to reflect heat.
Moss, on the other hand, is more damaging. It grows in damp, shaded areas and can lift shingles, creating pathways for water to seep in. Moss appears as thick, green patches and should be removed carefully. Use a soft brush to gently remove it, working from the top down to avoid lifting or loosening shingles.

To clean affected areas, mix a solution of one part bleach to three parts water and apply it on a cloudy day. Let it sit for 15–20 minutes before rinsing with low-pressure water. Avoid using pressure washers, as they can damage shingles or force water underneath them.
Preventing future growth is easier than dealing with recurring issues. Trim overhanging tree branches to allow more sunlight and improve air circulation. Installing zinc or copper strips near the roof ridge can also help. When rainwater flows over these metals, it creates conditions that naturally deter moss and algae.
If moss, algae, or mold keeps returning, it may indicate deeper moisture problems, such as poor attic ventilation, inadequate insulation, or structural issues. In such cases, consider consulting a professional to address the underlying causes.
Summer Roof Maintenance Checklist
Summer’s heat and intense sunlight can take a toll on your roof. While spring maintenance often focuses on moisture-related issues, summer requires addressing heat and pest concerns. High temperatures and UV exposure can lead to expensive repairs if not managed early. Start with a thorough inspection to spot any damage caused by the sun.
Look for Heat and Sun Damage
Scorching summer days can wreak havoc on your roofing materials. Asphalt shingles, for instance, can hit surface temperatures of 150°F or more, making them particularly vulnerable.
Keep an eye out for blistering, curling, and cupping, which signal wear and tear. Blistering shows up as small bubbles or raised areas caused by trapped moisture heating up and expanding. Curling and cupping weaken shingles, leaving them prone to wind damage and water leaks during summer storms.

Inspect for cracking, especially at the edges and corners of shingles, where stress is highest. The daily expansion and contraction from heat can cause tiny cracks that grow over time.
Watch for granule loss, which tends to accelerate in hot weather. Granules protect shingles from UV damage, and their loss exposes the asphalt layer beneath, speeding up deterioration. If you notice granules piling up in your gutters or bare spots on your shingles, it’s time to act.
Check Roof Ventilation
Proper ventilation is critical during summer to prevent heat buildup that can damage your roof and inflate your energy bills. Ideally, your attic should stay within 10-15°F of the outdoor temperature. This helps protect your roof structure and keeps cooling costs in check.
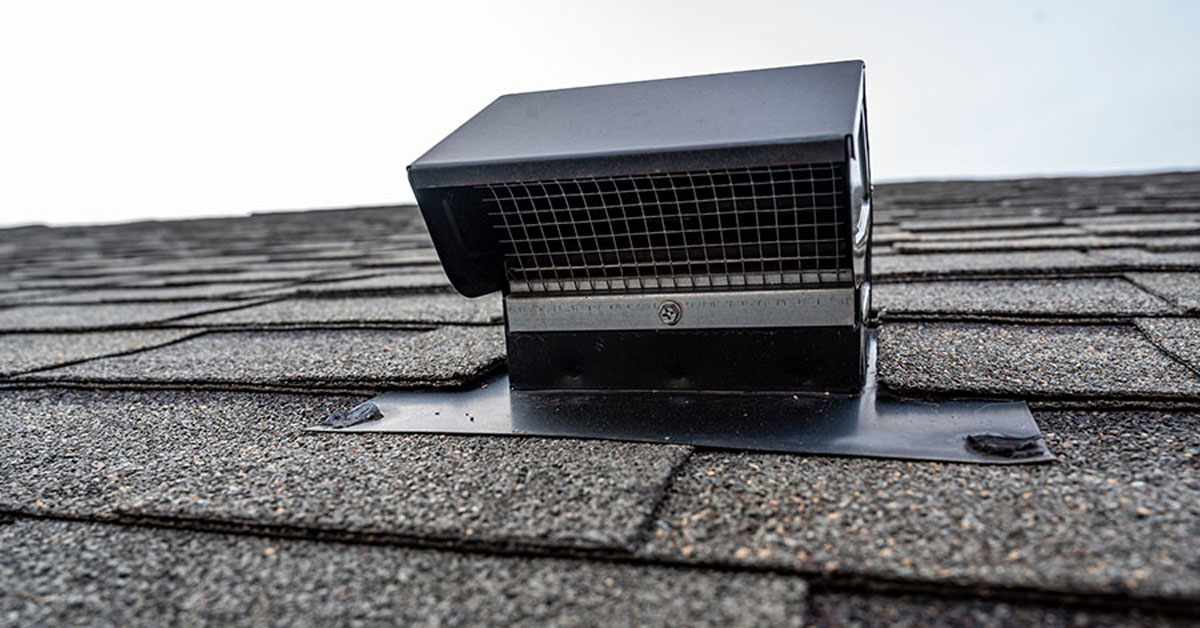
Inspect your ridge, soffit, and gable vents for blockages or damage. Ridge vents release hot air from the attic’s highest point, while soffit vents under the eaves draw in cooler air. Use a flashlight to ensure air can flow freely through these vents, as they often get clogged with dust, insulation, or even pest debris.
Test powered exhaust fans to ensure they’re working properly. Strange noises might indicate motor issues, and dust buildup on blades can reduce efficiency. Clean them regularly to keep them running smoothly.
Evaluate the balance between intake and exhaust ventilation. A good rule of thumb is one square foot of ventilation for every 150 square feet of attic space, split evenly between intake and exhaust vents. Imbalanced ventilation can reduce effectiveness and create pressure issues.
For turbine vents, check that they spin freely, even in light breezes. If they’re stuck, look for debris or damaged bearings. A non-functional turbine vent should be repaired or replaced promptly.
Now, let’s tackle the pest problems that often arise during summer.
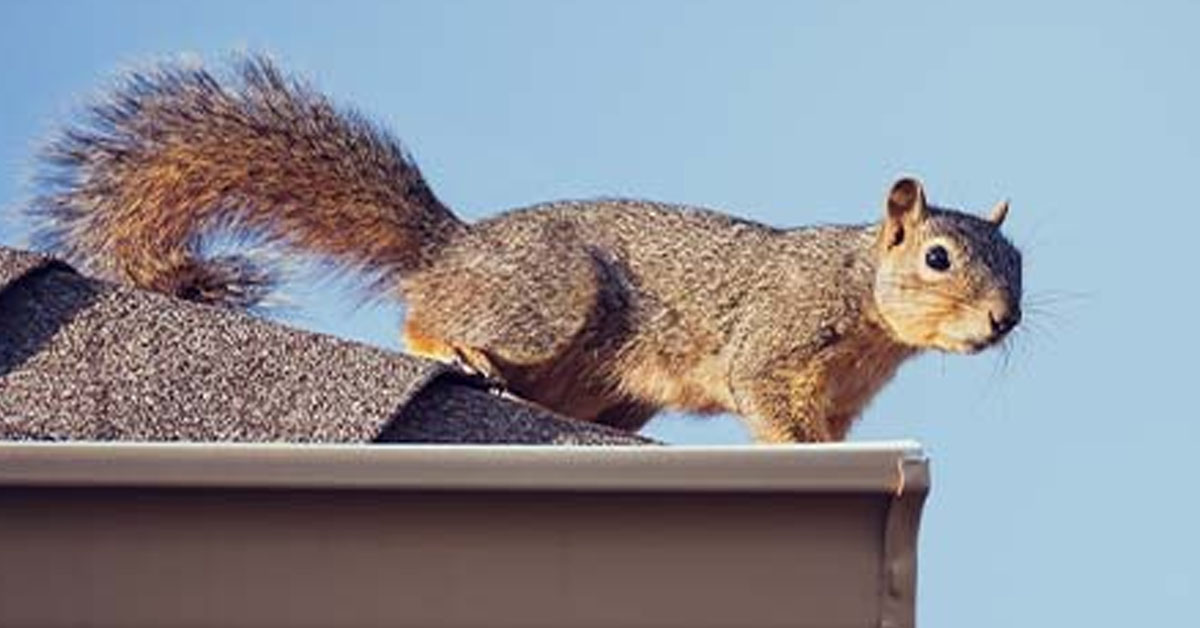
Remove Pest Nests and Block Entry Points
The warmth of summer makes your roof a prime spot for pests to nest. Birds, squirrels, bats, and insects can cause damage, create health risks, and even pose fire hazards with their nesting materials.
Bird nests often show up in gutters, under eaves, or around vents. While they may seem harmless, nests can block drainage and become fire hazards near electrical components. Remove old nests only after ensuring they’re abandoned, and install bird guards on vents to prevent future nesting.
Squirrels can chew through fascia boards, soffits, and even vent openings to access your attic. Look for chew marks, scattered debris, or holes that have been enlarged. Address any damage immediately to keep them out.
Wasp and hornet nests tend to appear under eaves or in sheltered corners. These nests can grow large and pose safety risks during maintenance. For small nests, remove them in the early morning or evening when insects are less active. For larger or hard-to-reach nests, call a professional.
Check for bat entry points near ridge vents, gable vents, or roof intersections. Bats can squeeze through openings as small as half an inch. Look for dark stains around these areas, which indicate repeated use.
Carpenter ants are another concern during hot weather, as they seek out moisture. Look for small piles of sawdust near roof edges or wooden components, which could signal both pest activity and moisture issues that need addressing.
To manage pests effectively, inspect problem areas, remove nests carefully, and repair any damage. Use protective measures like hardware cloth to cover vulnerable spots or seal openings with caulk and expanding foam. Replace damaged chimney screens and ensure caps are secure. Lastly, trim tree branches that hang within six feet of your roof to prevent animals from gaining access and to reduce scraping damage during windy days.
sbb-itb-66ccccd
Fall Roof Maintenance Checklist
Fall is your last opportunity to prepare your roof for winter. With leaves piling up and storms on the horizon, it’s the perfect time to focus on your roof’s drainage systems and overall condition to keep your home safe during colder months.
Clean Gutters and Downspouts
Start by tackling your gutters and downspouts to avoid water damage during winter. Fallen leaves can clog these systems, so it’s critical to clear them out before the added weight of snow and ice makes things worse.
Remove leaves and debris from your gutters, then flush them with water to check for proper flow. If water backs up, use a plumber’s snake or pressure washer to remove blockages. Tighten any loose hangers and patch small holes with roofing cement. Pay extra attention to areas beneath overhanging branches, as they’re prone to collecting debris.
Consider installing downspout strainers to minimize future clogs, but be sure to clean them frequently during peak leaf fall. Also, inspect for rust, holes, or separated joints in your gutters. If the damage is extensive, it might be time to replace them.
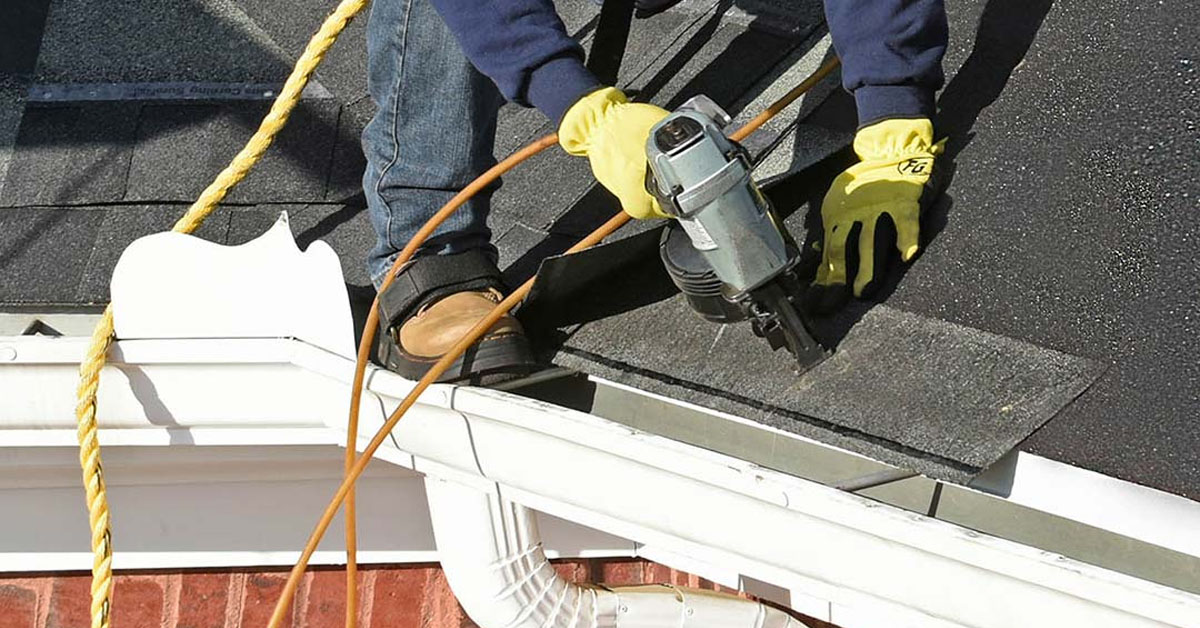
Check for Loose or Damaged Shingles
Your shingles are your roof’s first line of defense, so it’s essential to ensure they’re in good shape before winter. Even minor issues can lead to water leaks, damage to underlying materials, and mold growth.
From the ground, use binoculars to spot missing, sagging, or damaged shingles. Then, if it’s safe, climb a ladder for a closer look. Check for cracks, tears, granule loss, or curling edges. Granule loss can be a sign of aging shingles and might show up as excessive granules in your gutters. Watch out for uneven or warped shingles too, as they’re more likely to be lifted by strong winter winds.
Don’t forget to check your attic for signs of leaks, like water stains, dark spots, or sagging insulation – especially around chimneys, vents, and valleys. Addressing these issues now can save you from bigger problems later.
To fix damaged shingles, secure loose ones with roofing nails along the nail line. For cracked shingles, apply roofing cement under the crack and press down firmly. If you notice widespread damage or significant granule loss, it might be time to call a professional for a thorough inspection.
Inspect Sealants and Flashing
Sealants and flashing are critical for protecting vulnerable areas of your roof. Take a close look at flashing around chimneys, vents, skylights, and roof intersections. Check for rust, looseness, or gaps in the sealant, and repair or replace as needed.
Examine vent boot seals around plumbing vents and exhaust fans. Over time, rubber boots can crack or shrink, leaving gaps. Replace worn boots and use roofing cement to seal minor issues.
For skylights, inspect the flashing where the frame meets the roof. Look for separated caulk lines, loose screws, or water stains near the interior frame. Clear out any debris from skylight wells to prevent water from pooling.
Lastly, check the valley flashing where two roof planes meet. These areas handle a lot of water runoff, so look for dents, holes, or gaps that could let water seep in. Make sure the drip edge flashing along the roof’s perimeter is intact, as it helps direct water away from fascia boards and protects wooden components from moisture damage.
Winter Roof Maintenance Checklist
Winter weather can be tough on your roof, with heavy snow and ice posing serious risks. From structural strain to ice dams, these challenges call for a proactive approach that prioritizes safety. Since cold and slippery conditions increase the chance of accidents, many tasks are best handled from the ground or left to professionals.
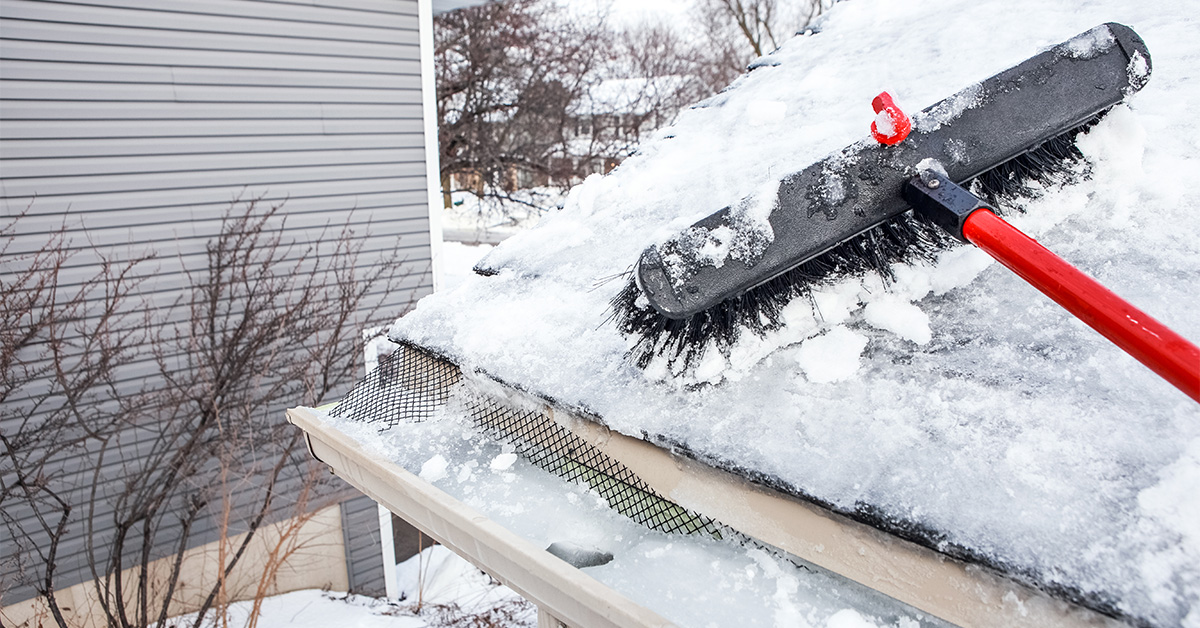
Remove Snow Safely
Snow buildup can weigh heavily on your roof, increasing the risk of damage and ice dams. To reduce this stress, use a long-handled roof rake to clear snow near the roof’s edge while staying safely on the ground. Focus on areas where snow tends to accumulate, like valleys or around roof features. If you notice sagging gutters due to snow and ice, remove any accessible snow buildup. However, avoid climbing onto a snow-covered roof – leave that to professionals if the accumulation is significant.
Once the snow is cleared, it’s time to address ice dams and condensation, which can lead to water damage if left unchecked.
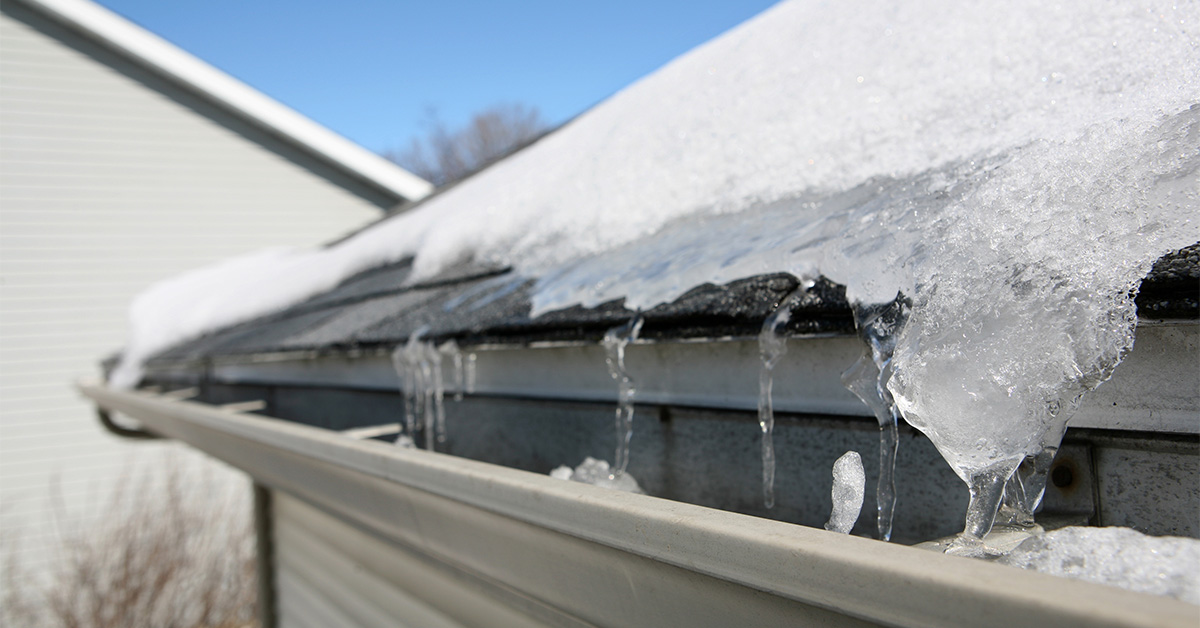
Watch for Ice Dams and Condensation
After clearing the snow, check for ice dams and moisture problems. Ice dams occur when melting snow refreezes at the roof’s edge, blocking proper drainage and potentially causing water to seep into your home. This can result in damage to walls, ceilings, insulation, and personal items. Look out for large icicles along your gutters or significant ice buildup at the roof’s edge. Inside, check for water stains near the roofline, which may indicate leaks.

Ice dams are often caused by warm air escaping from your home, which melts snow on the roof. That meltwater then refreezes at the colder edges. To prevent this, ensure your attic is properly insulated – an R‑value of at least R‑30 is recommended, and R‑38 is ideal for colder regions. Also, inspect for frost on the roof deck or wet insulation, as these could signal poor ventilation or air leaks. Make sure that exhaust fans from your kitchen and bathroom vent directly outside rather than into the attic.
If you spot icicles or ice buildup, clear gutters and downspouts to maintain proper drainage. You can safely remove smaller icicles by hand, but avoid using tools that might damage your gutters or create new hazards.
Check for Storm Damage
Once you’ve managed snow and ice, assess your roof for any storm-related damage. From the ground, use binoculars to look for missing shingles, damaged flashing, or debris buildup. Pay attention to sagging areas, as these could indicate structural stress caused by snow or storms.
Inside your home, inspect the attic for signs of trouble. Look for water stains, wet insulation, or daylight peeking through gaps in the roof deck, especially around chimneys, vents, and skylights – common areas where damage starts. Take photos of any visible damage for insurance purposes, but always prioritize safety.
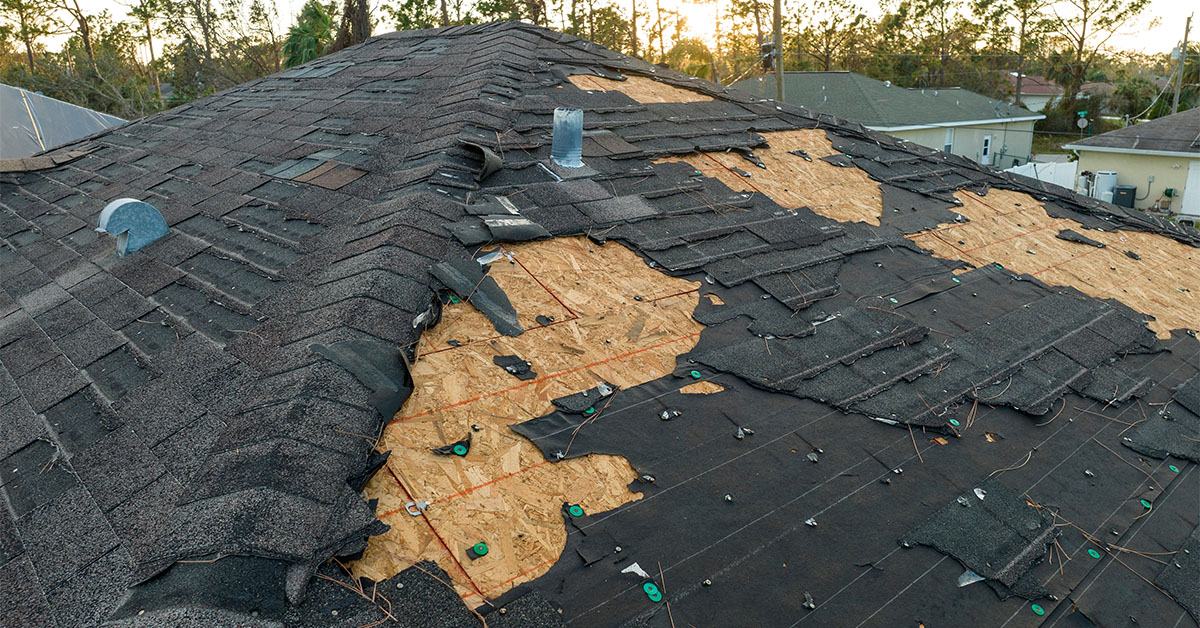
For major issues, like large sections of missing shingles or exposed roof decking, contact a professional immediately. If the damage is minor, mark the affected areas and schedule repairs when the weather improves. In urgent situations, such as water actively entering your home, use buckets to catch the drips and reach out to a roofing expert right away.
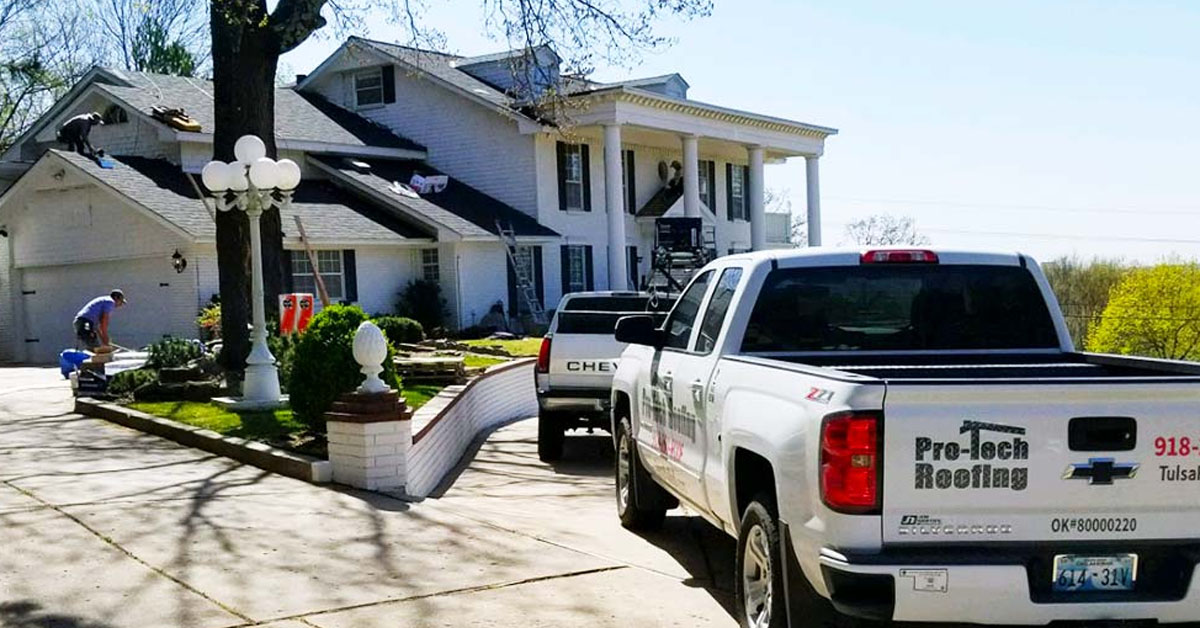
When to Call a Professional: Pro-Tech Roofing Services
After conducting your seasonal roof inspections, you might come across issues that are beyond your ability to handle. While regular maintenance can catch many problems early, certain roofing concerns demand professional expertise. Bringing in the pros not only saves you money in the long run but also helps prevent injuries and ensures your roof gets the care it needs. Recognizing the signs of serious trouble can help you decide when it’s time to make that call.
Signs You Need Professional Help
Structural damage is one of the clearest indicators that you need to contact a roofing professional. If you notice sagging areas on your roof – especially after a heavy snowfall or storm – this could mean the structural integrity has been compromised, posing serious safety risks. Similarly, large sections of missing shingles, exposed roof decking, or damaged flashing around chimneys and vents require immediate attention from an expert.
Persistent water damage is another red flag. While minor leaks might seem manageable, spreading water stains on ceilings or walls often point to deeper issues, like ongoing moisture infiltration. This can lead to mold growth and even structural damage. If you find wet insulation in your attic or encounter multiple leaks during storms, it’s time for professional intervention to locate and fix the root cause.
Safety concerns are another reason to call in experts. Tasks like walking on steep roofs, working at heights over 10 feet, or dealing with damaged electrical components near roof-mounted equipment can be dangerous. If you’re uncomfortable or unsure about handling these risks, it’s best to leave it to the professionals.
Finally, recurring problems despite DIY fixes are a sign of deeper issues. Persistent ice dams, ongoing ventilation troubles, or mold and algae growth that keep coming back after cleaning suggest underlying problems that need a professional diagnosis and solution.
Pro-Tech Roofing’s Services
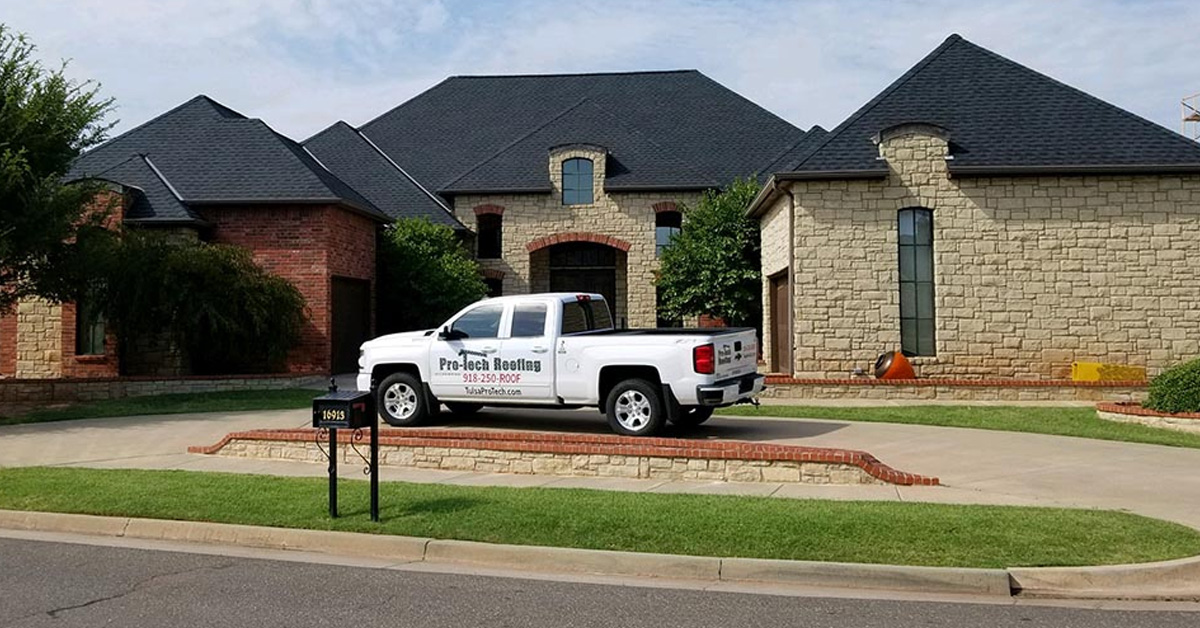
When these problems arise, Pro-Tech Roofing is ready to step in with the expertise needed to restore your roof’s integrity. Serving the Tulsa area, Pro-Tech Roofing provides timely, professional assistance for situations where routine maintenance just isn’t enough.
Pro-Tech Roofing offers free roof inspections, giving homeowners a professional evaluation of their roof’s condition without any upfront cost. This allows potential issues to be identified early, preventing costly repairs down the road.
For residential properties, Pro-Tech Roofing handles everything from minor repairs to full roof replacements, using high-quality materials. Their team is certified by leading manufacturers like GAF and Owens Corning, ensuring that every installation meets top industry standards. They even specialize in roofing for historic homes, using materials and techniques that preserve the character and integrity of older properties.
Their commercial roofing services are tailored to the unique needs of businesses, including flat roof repairs and maintenance. Pro-Tech Roofing also provides elastomeric coatings and complete roof restoration services, which can significantly extend the lifespan of commercial roofing systems.
One standout offering is their metal roof restoration service. Through the use of professional-grade elastomeric coatings, panel replacements, and flashing repairs, Pro-Tech Roofing helps property owners extend the life of their metal roofing without the expense of a full replacement.
Pro-Tech Roofing also assists homeowners with insurance claims, guiding them through the often-complicated process of documenting storm damage and working with insurance adjusters. Their experience ensures thorough assessments and proper documentation, which can be critical for claim approval.
Fully licensed and insured, Pro-Tech Roofing provides the accountability and protection homeowners expect from a trusted professional. With a strong local presence in Tulsa, they understand the area’s weather patterns, building codes, and the specific challenges Oklahoma homeowners face throughout the year.
Conclusion: Seasonal Maintenance for Long-Term Roof Health
The checklists above show that every season brings its own set of challenges for your roof. By following a seasonal maintenance routine, you can safeguard one of your home’s most critical components. Spending just a few hours each season can help you address small issues – like leaks – before they turn into expensive problems like water damage, mold, or structural repairs. Regular inspections not only minimize repair costs but also extend the lifespan of your roof.
Each season brings unique demands. Whether it’s fixing damage from winter storms or preparing for the intense heat of summer, staying ahead of these challenges keeps your roof in top shape.
The key here is consistency. Skipping seasonal maintenance often leads to unexpected and costly repairs. And let’s face it – bad weather isn’t going to wait for you to be ready, so staying proactive is essential.
If you come across issues that feel beyond your skill set, Pro-Tech Roofing offers a free inspection service. Their certified team, well-versed in Oklahoma’s unpredictable weather, can spot problems you might miss. Whether you need small repairs, major restoration, or help navigating insurance claims, they’ve got you covered.
Your roof works hard to protect your home every single day. Seasonal maintenance ensures it can keep doing its job for years to come. Start tackling your next seasonal checklist today – you’ll be glad you did.
FAQs
What are the signs that my roof might have winter damage and needs a professional inspection?
Winter weather can be tough on your roof, so keeping an eye out for warning signs of damage is essential. Start by checking for missing, cracked, or warped shingles, sagging spots, or ice dams forming along the roof’s edges. Inside your home, pay attention to water stains, leaks, or an unusually damp attic – these can all lead to mold if left unchecked.
After a heavy snowfall or storm, take a closer look for damage like cracked or dented shingles. Spot anything concerning? It’s smart to call in a professional to evaluate the situation. Catching issues early can save you from expensive repairs down the line.
What are the signs of poor roof ventilation, and how can it impact my home?
Poor roof ventilation can reveal itself in various ways, such as excessive attic heat, mold or mildew growth, persistent musty smells, rusted nails or metal fixtures, shingles that curl or crack, and ice dams forming in winter months. These symptoms often point to inadequate airflow, which can lead to bigger problems if left unchecked.
When air circulation is lacking, your roof may wear out more quickly, potentially leading to expensive structural repairs. Additionally, poor ventilation can make it harder to regulate indoor temperatures, driving up energy costs. Moisture buildup is another concern – it can affect air quality inside your home and create a perfect environment for mold to thrive. Tackling these issues early can safeguard both your home and your family’s well-being.
How can I prevent ice dams in winter, and when should I contact a professional for help?
To keep ice dams at bay during winter, start by clearing excess snow from your roof with a roof rake or similar tool. This helps reduce the weight on your roof and prevents snow from melting unevenly. Also, make sure your gutters and downspouts are free of ice and debris so water can drain properly.
Another key step is improving your attic’s insulation and ventilation. A well-insulated and ventilated attic helps maintain an even roof temperature, reducing the chances of snow melting and refreezing at the edges.
If you’re dealing with stubborn ice buildup, leaks, or damage that feels unsafe to handle, it’s best to call a professional roofer. They have the right equipment and expertise to manage these issues safely, even in freezing conditions.